Anchor Protocol is one of the many projects launched on Avalanche this year. Since then, Anchor has emerged as an amazing platform for $AVAX holders seeking to earn yield on their tokens. So, you can now use staked $AVAX ($sAVAX) as collateral on Anchor Protocol.
The process isn’t scary at all. However, it requires patience. Our previous article gave an insight on how to deposit $sAVAX on Anchor. But we figured that there were new investors who might need something more detailed than what we offered earlier. So, if you are already comfortable using a bridge, you can read other articles on our site. Otherwise, you can keep scrolling down for deeper details.
1/ It’s happening – $sAVAX is now live as a new collateral option on Anchor!
You can now borrow $UST via @wormholecrypto with $AVAX as collateral through the xAnchor implementation of Anchor on @avalancheavax pic.twitter.com/B2vLk3MPj0
— Anchor Protocol (@anchor_protocol) March 23, 2022
Set up Your Metamask Wallet
- To receive your $AVAX, you’d need to step up a MetaMask wallet and add the Avalanche Network as an option. However, to learn how to add the Avalanche Network to MetaMask, follow the link.
2. Once you’ve finished setting up your MetaMask wallet and added Avalanche Network, you’d see the display below.
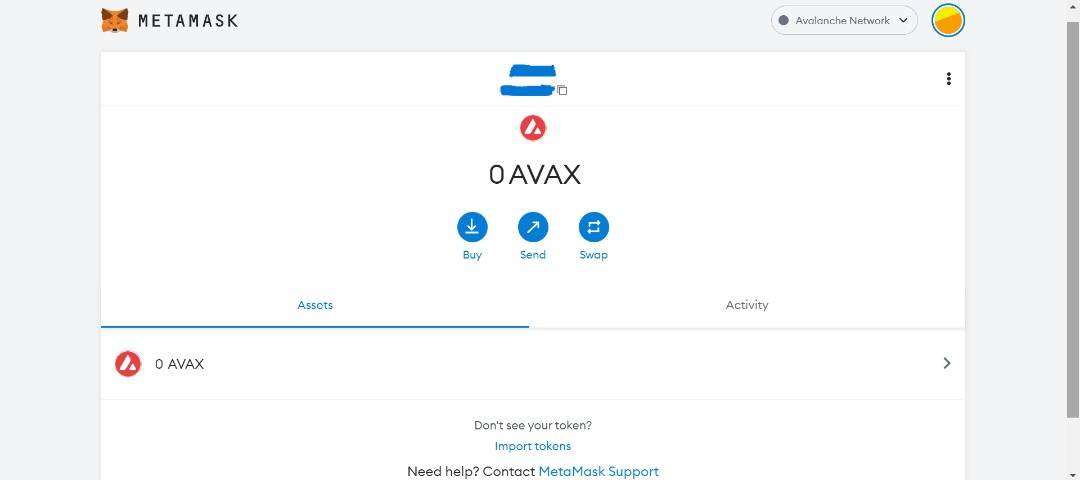
3. Send some $AVAX to your MetaMask wallet from a centralized exchange like Binance or MEXC.
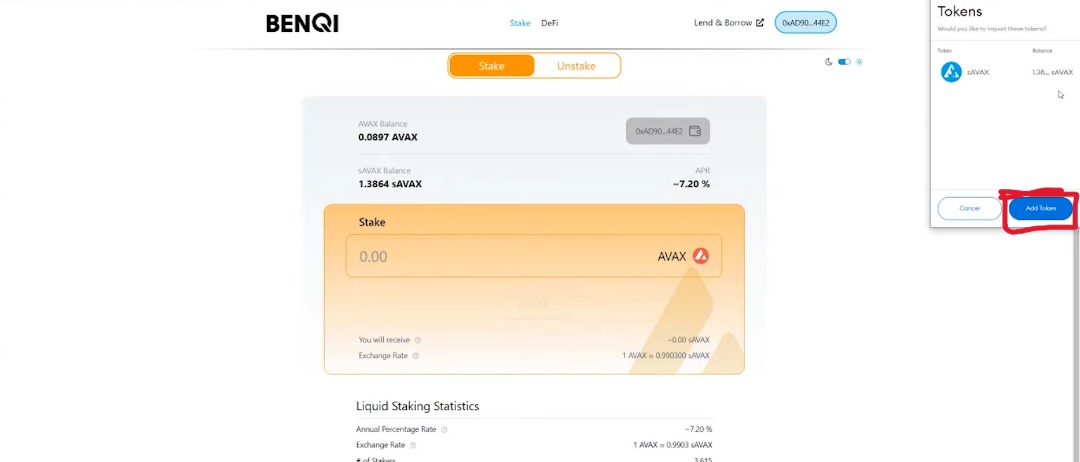
Getting $sAVAX via BENQI
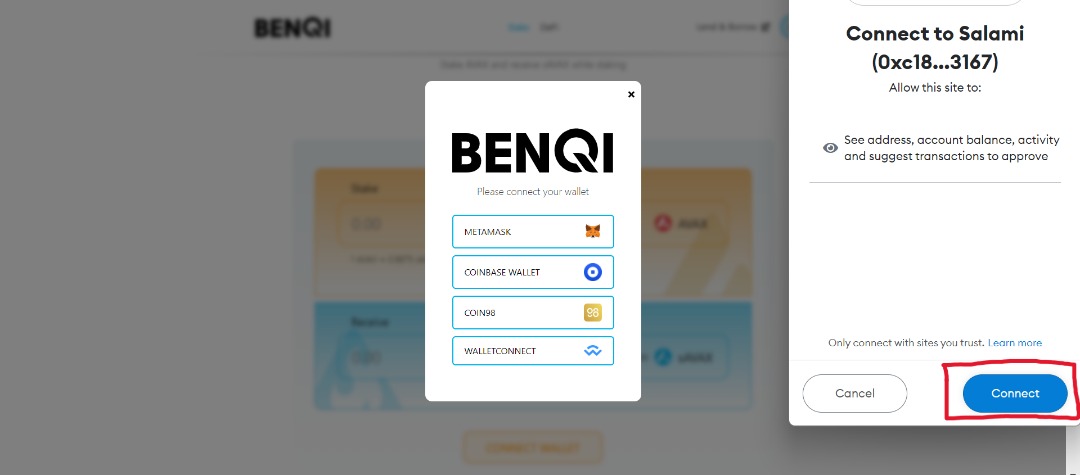
4. Obtain $sAVAX through BENQI. To do this, follow the link to head to BENQI.
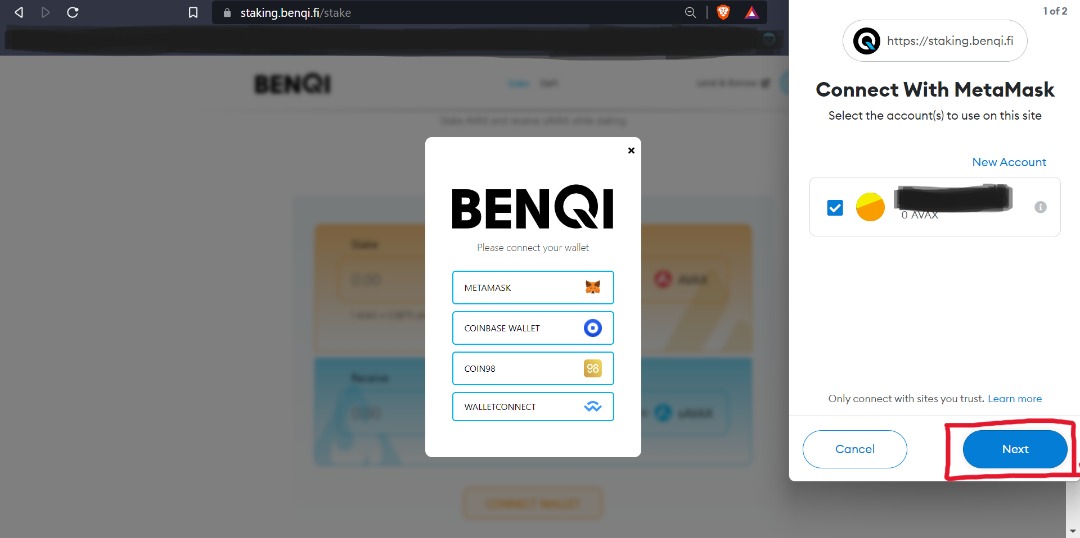
5. Connect your MetaMask wallet to BENQI.
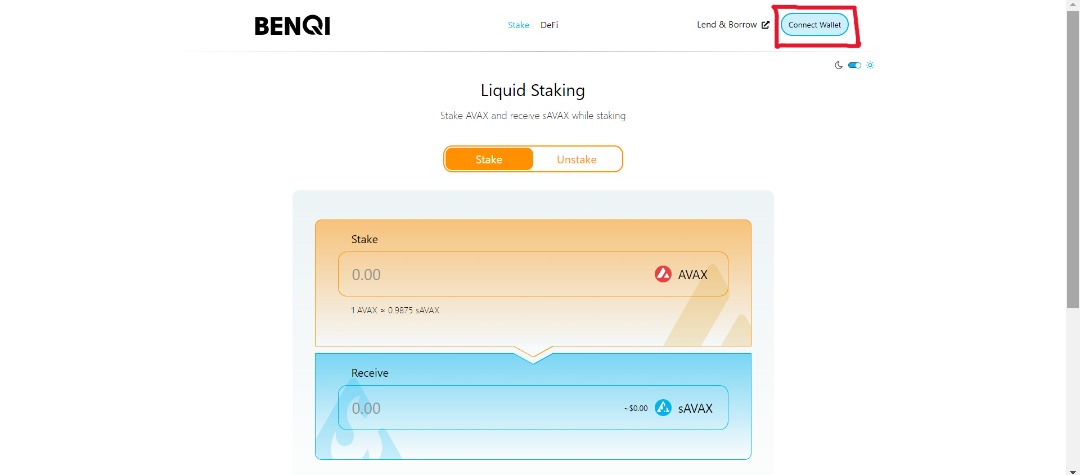
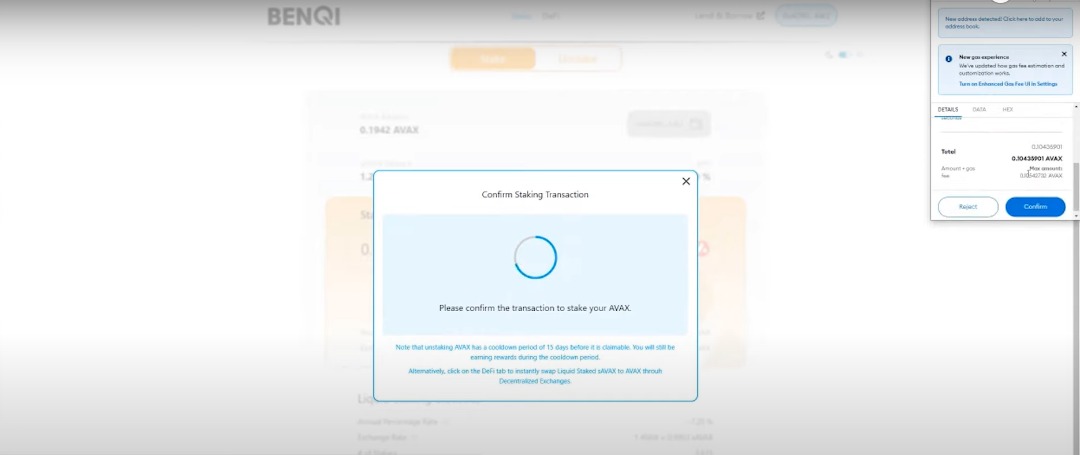
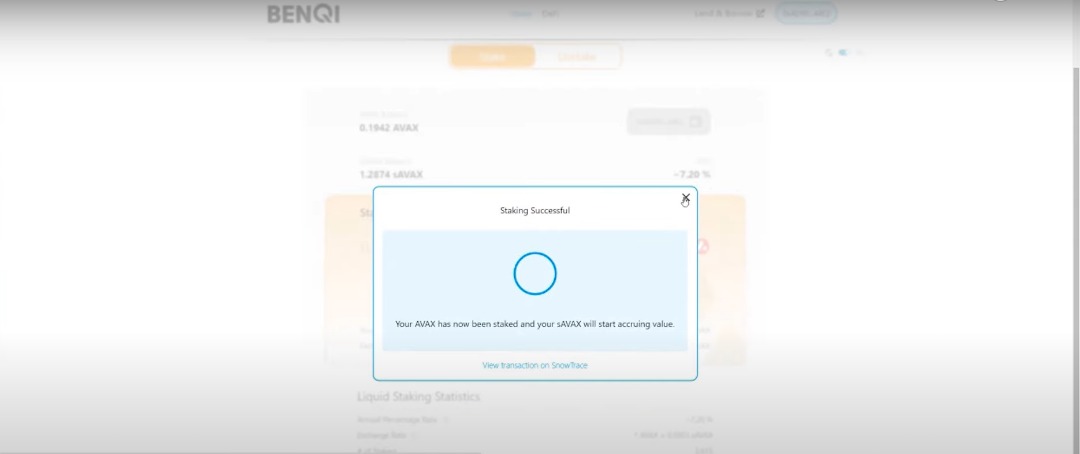
6. Enter the amount of $AVAX you want to stake and click the stake button. This will also be the amount of $sAVAX you’d get. Also, ensure you have an extra amount of $AVAX to pay for transaction fees for the entire process

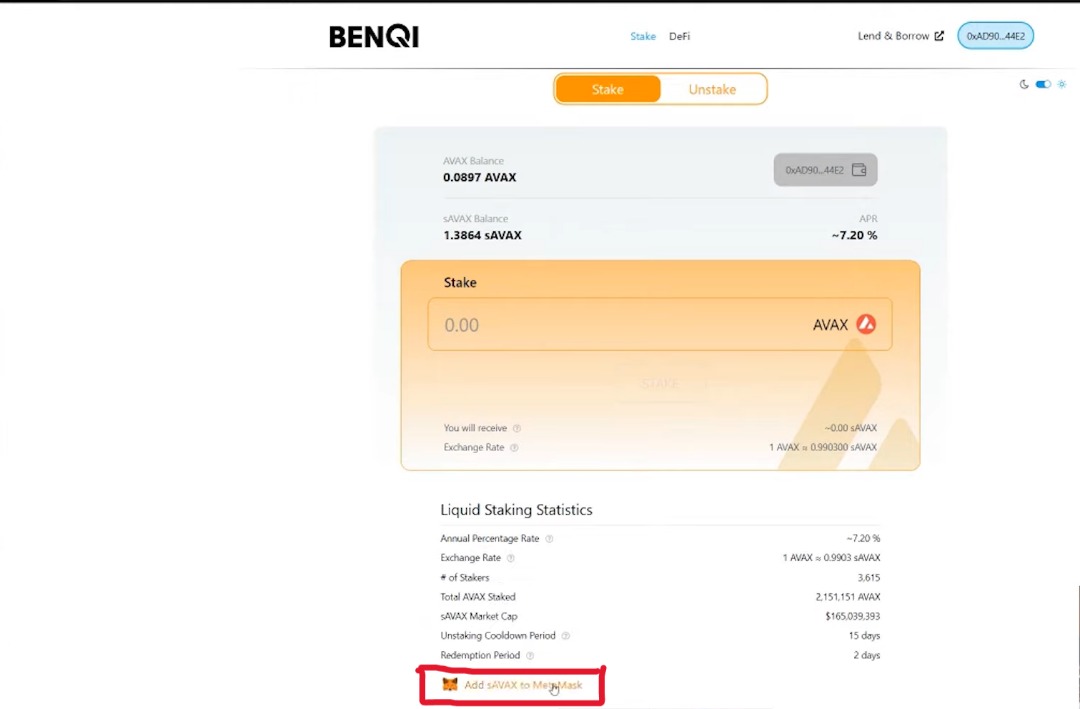
7. Now you have your $sAVAX, but it won’t be visible in your MetaMask wallet. Still, on the BENQI page, scroll down and you’d see a button that says “add sAVAX to MetaMask.”
Bridge $sAVAX to Terra
8. Visit https://www.portalbridge.com/#/transfer to bridge $sAVAX to Terra. Once you bridge $sAVAX from Avalanche Network to Terra, it becomes $wasAVAX.
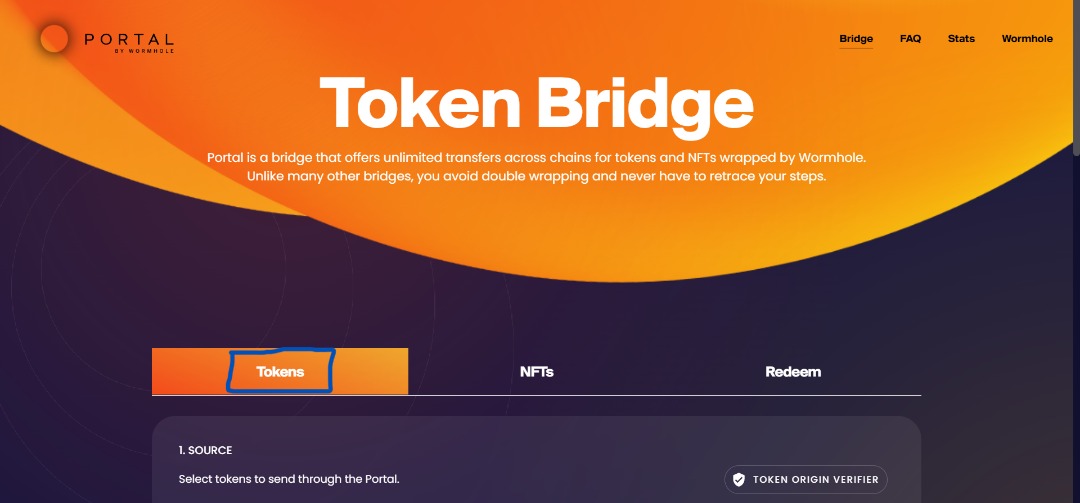
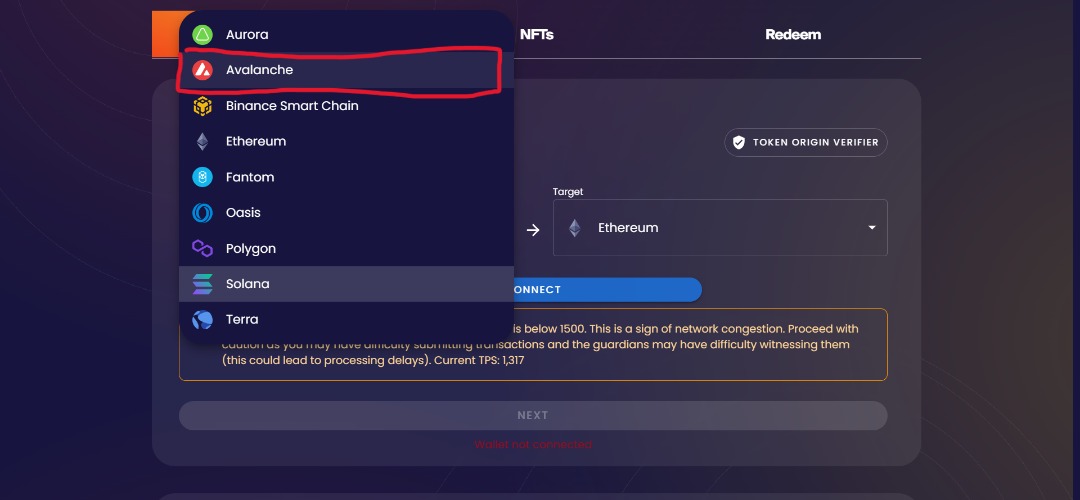
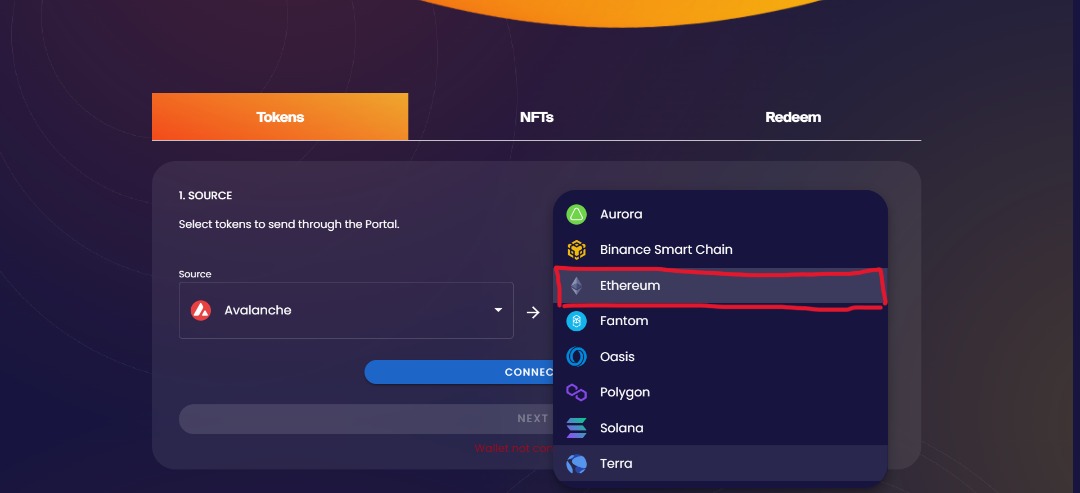
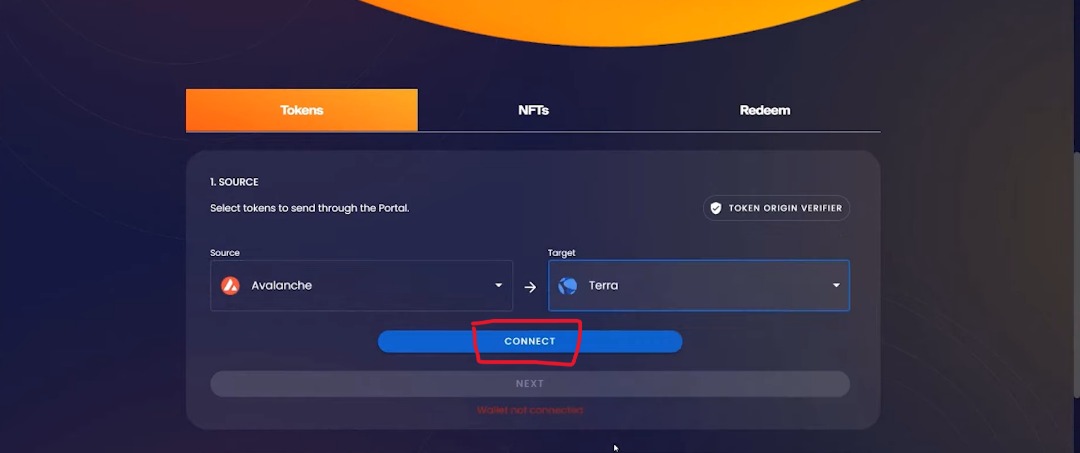
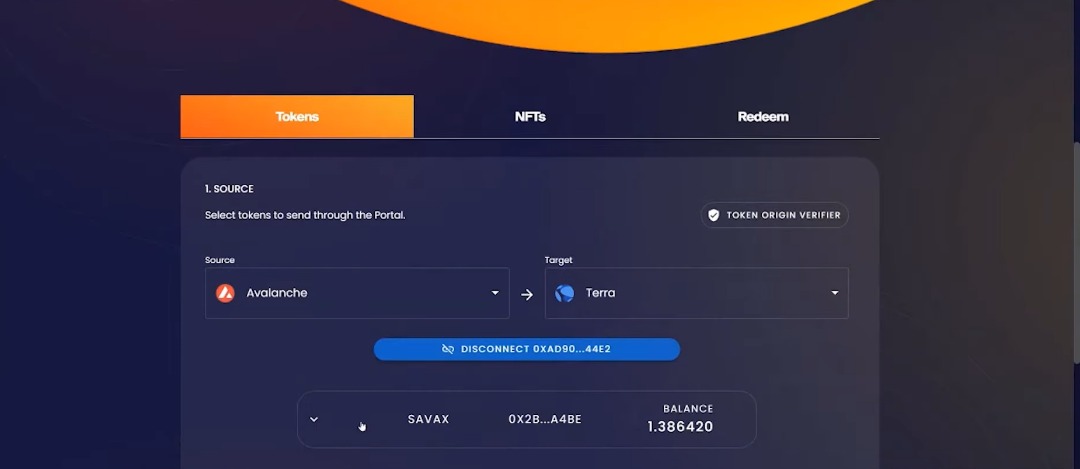
9. Under the Tokens Tab, define the source you are bridging from, i.e., Avalanche, and define the target, i.e., Terra.
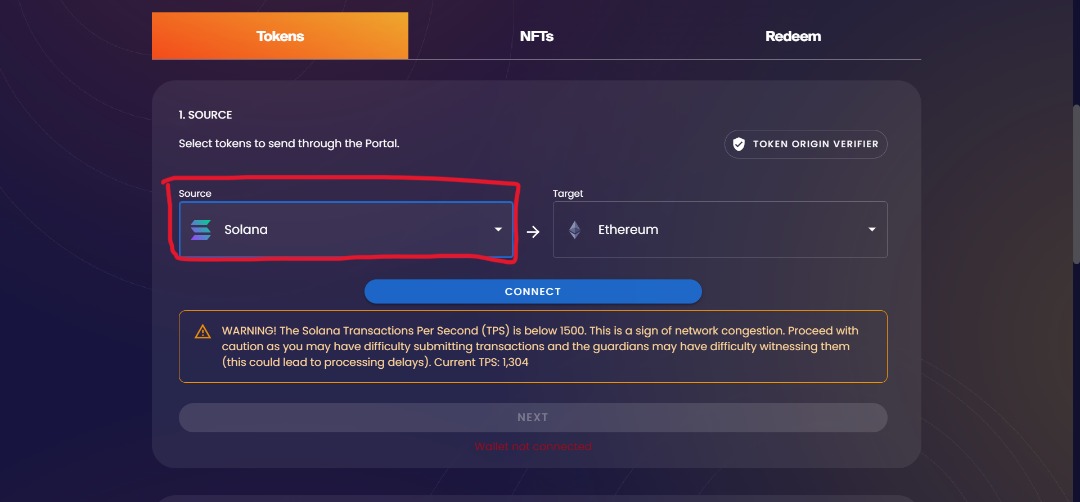
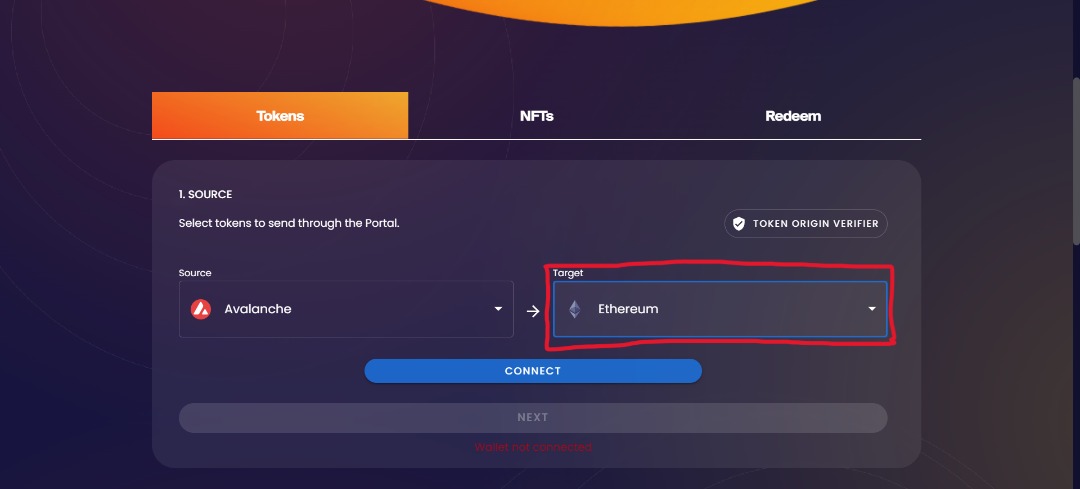
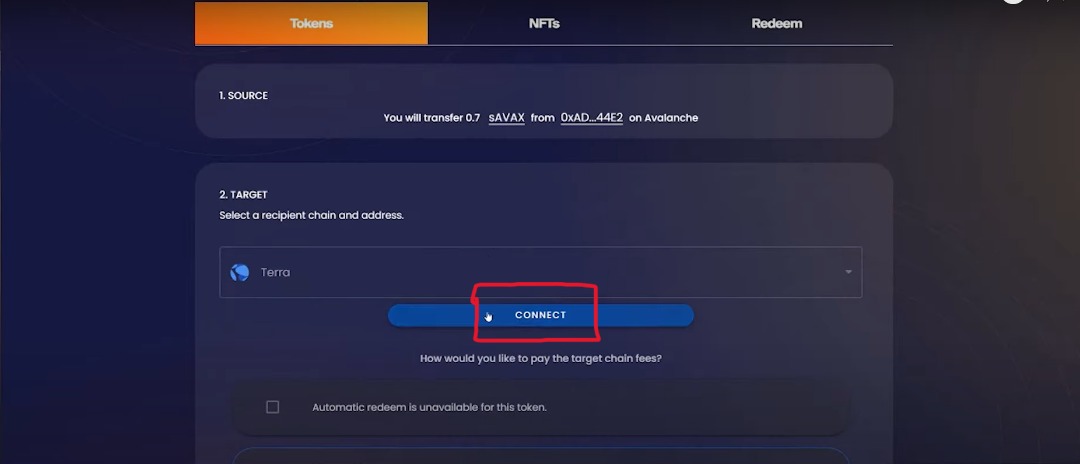
10. Click the Connect button to connect your MetaMask wallet.
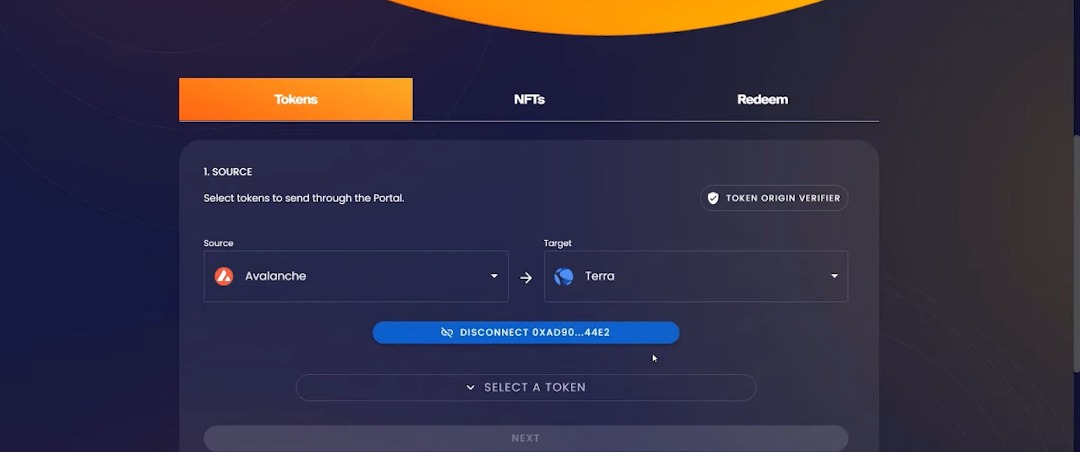
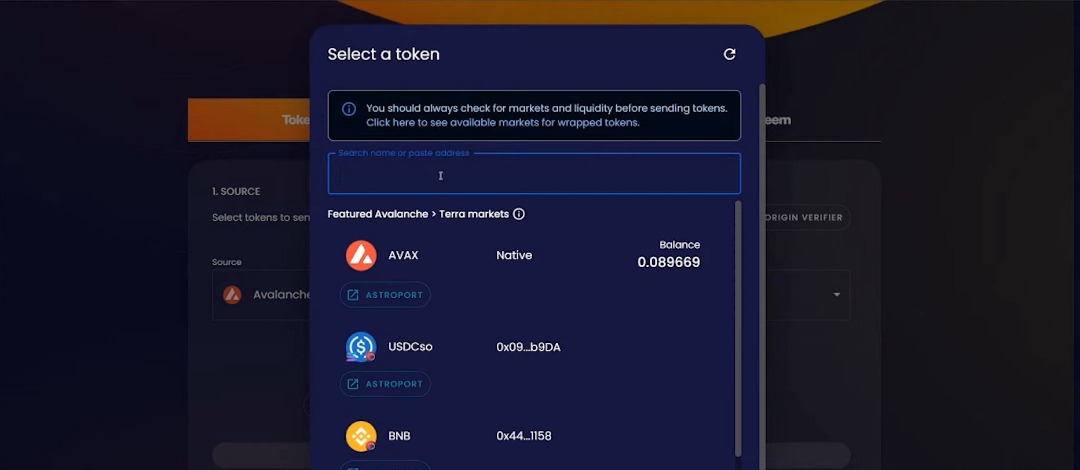
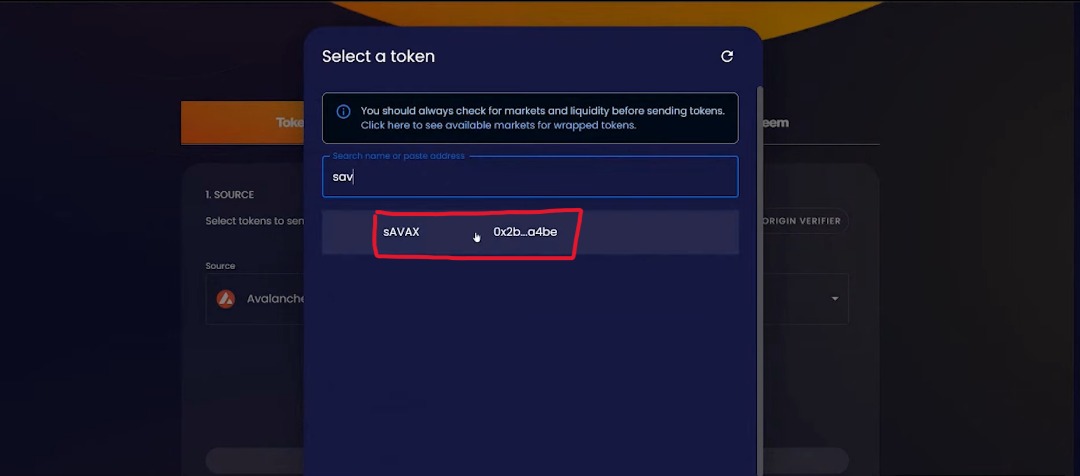
11. Select the token to define the token you want to bridge. On the search box, type and search for $sAVAX.
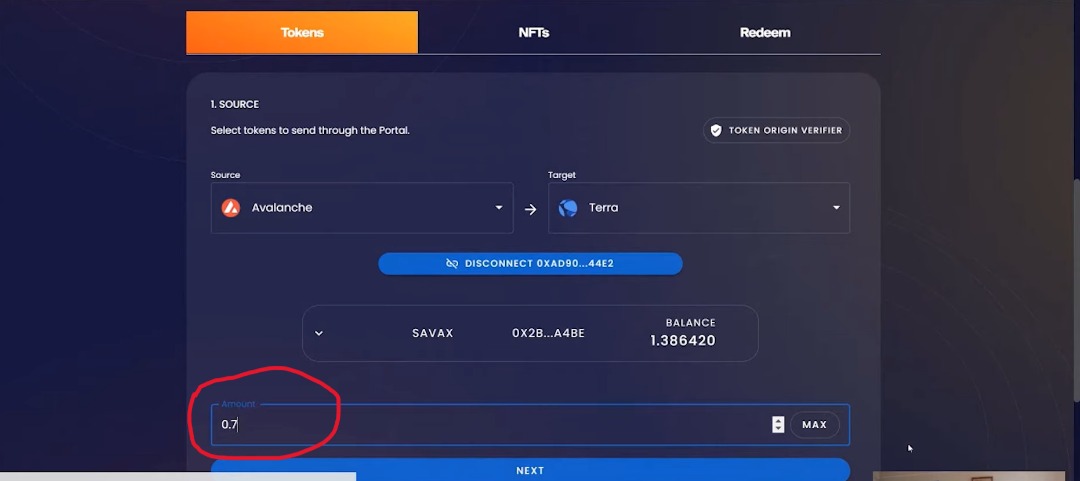
12. Specify the amount of $sAVAX you want to bridge and click Next.
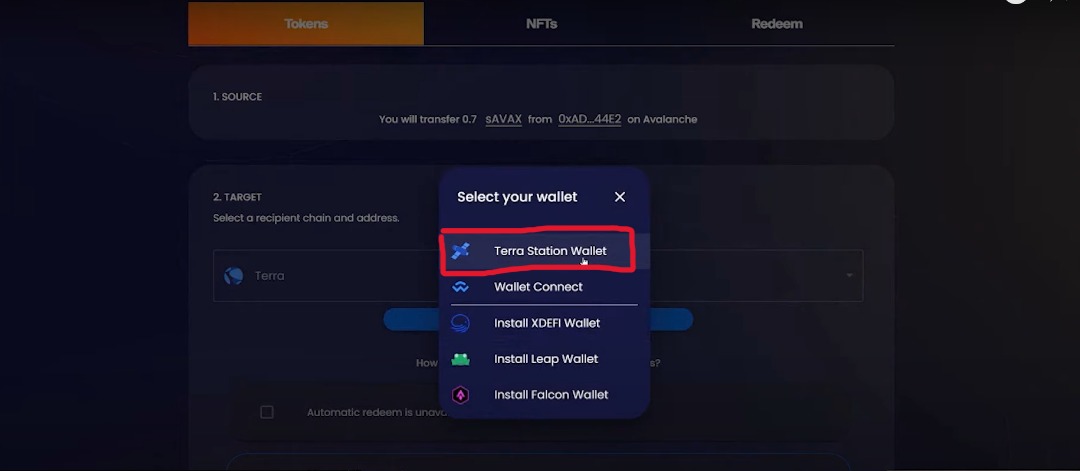
13. Connect your Terra Station wallet.
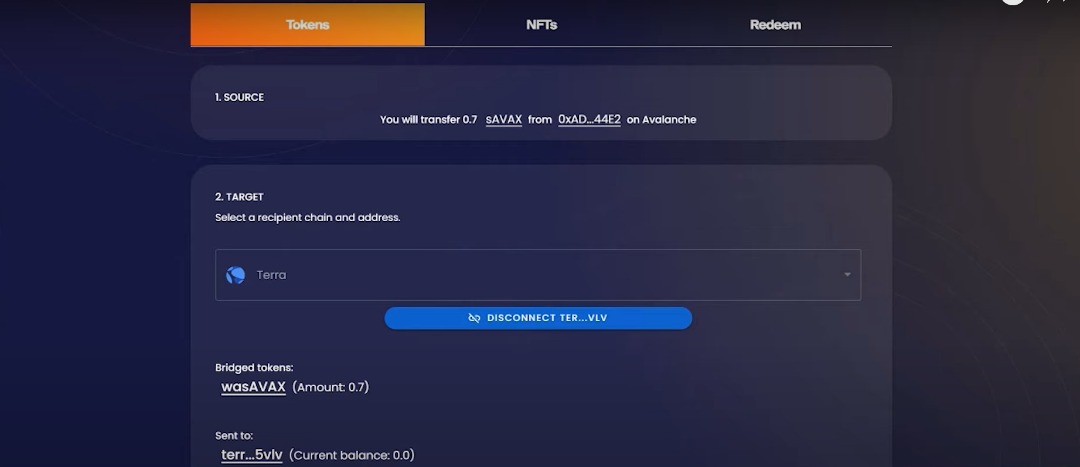
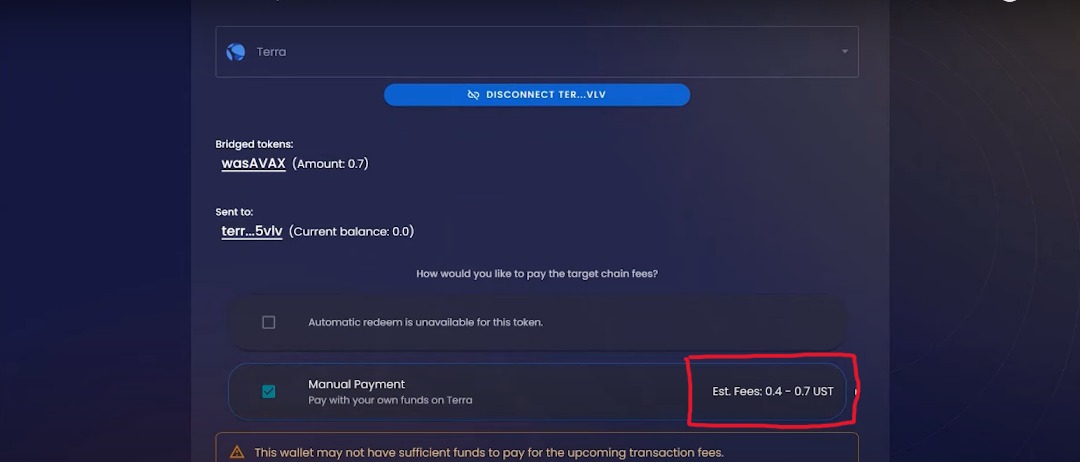
14. However, you need to have a certain amount of $UST in your Terra Station wallet to be able to successfully execute the bridging process. Once you’re certain you have enough $UST, click the NEXT button.
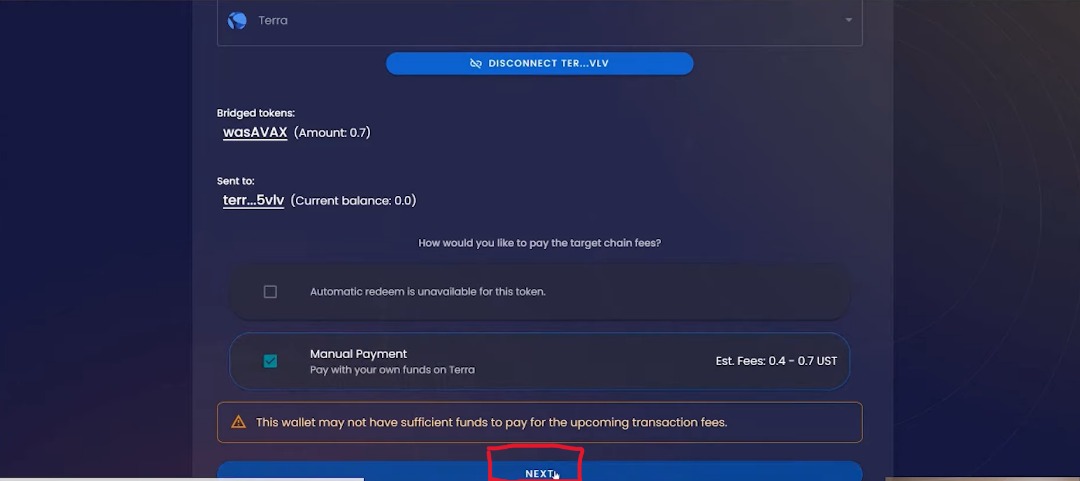
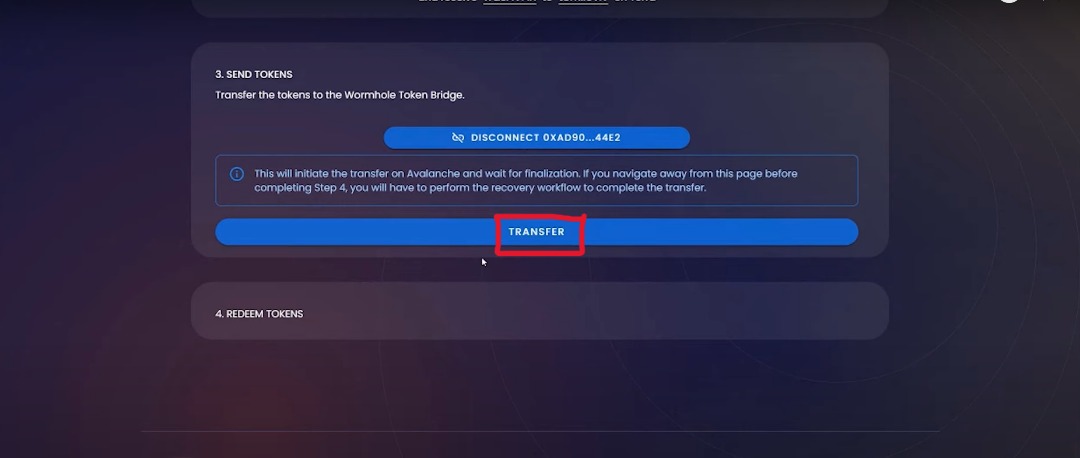
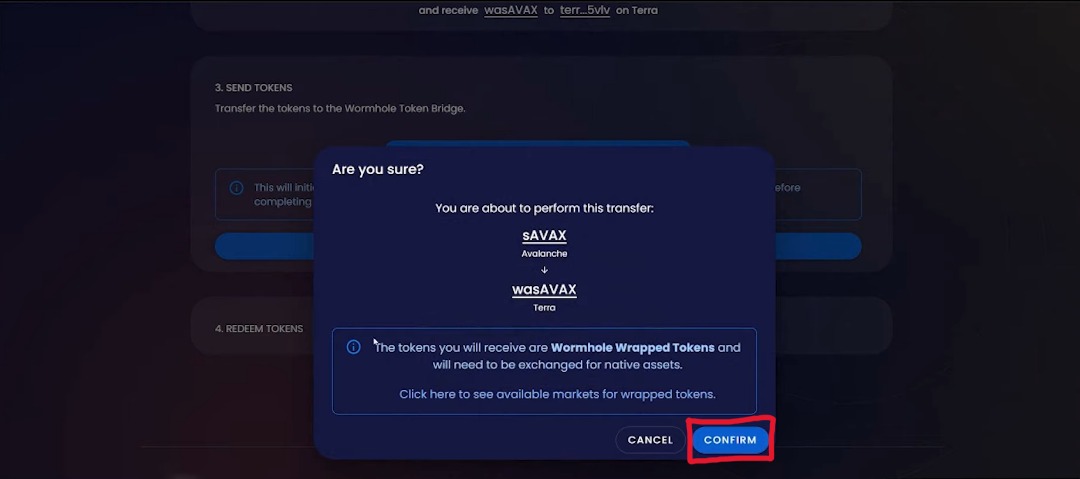
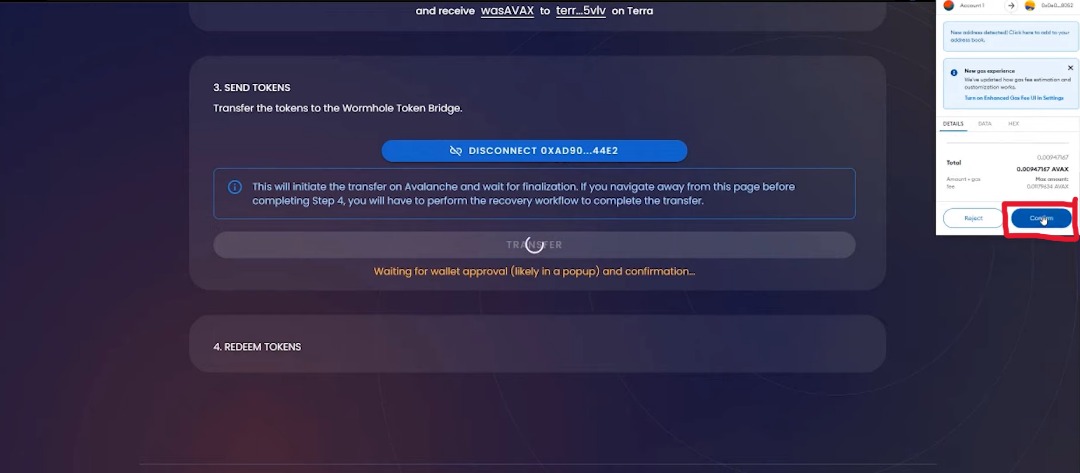
15. Confirm the bridge (transaction) and initiate the token transfer.
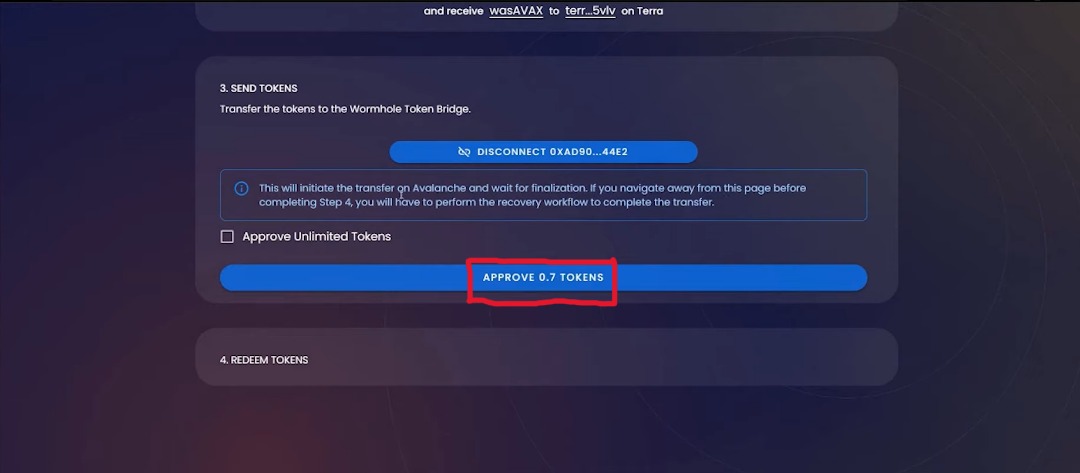
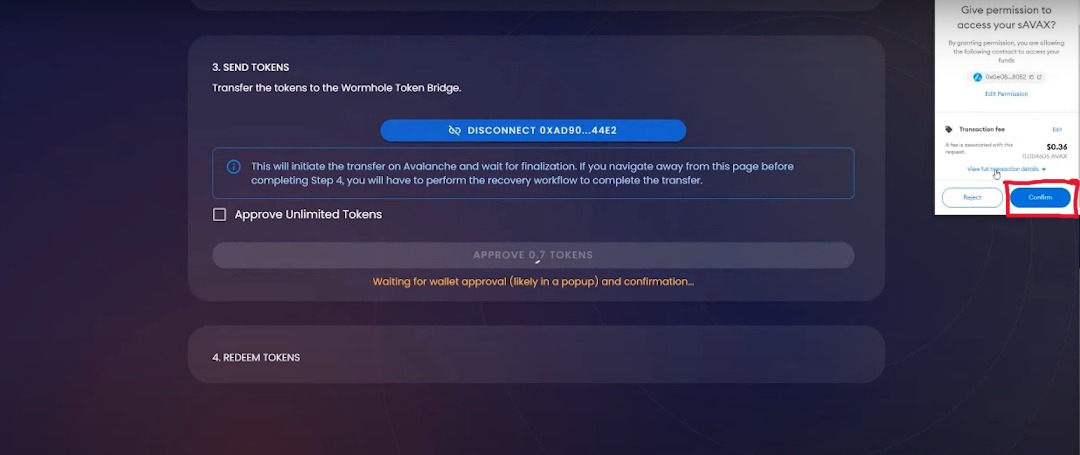
16. The protocol will notify you of what will happen to your $sAVAX (i.e., your $sAVAX will become $wasAVAX when transferred to the Terra Network). But, you need to have enough $AVAX in your MetaMask wallet to pay for the transaction fees.
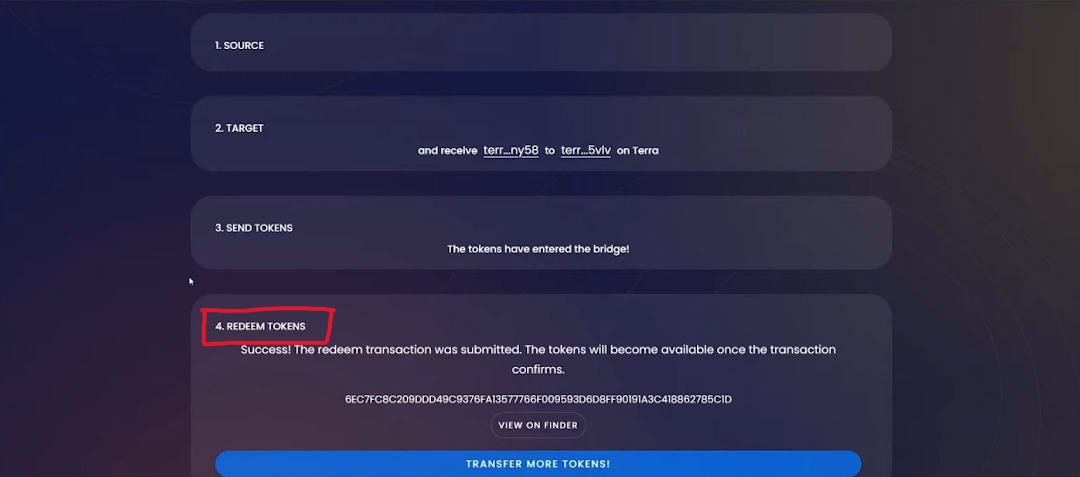
17. Once the bridging transaction is completed, you’d get a prompt in the protocol, displayed in step 4 (Redeem Tokens). SO, this essentially notifies you that your bridged tokens are available in the Terra Network.
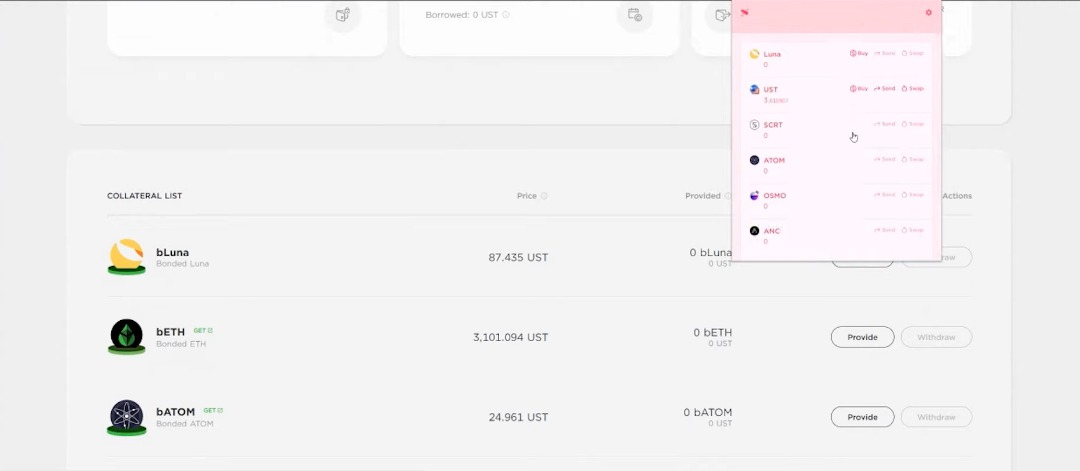
Stake your $sAVAX in Anchor
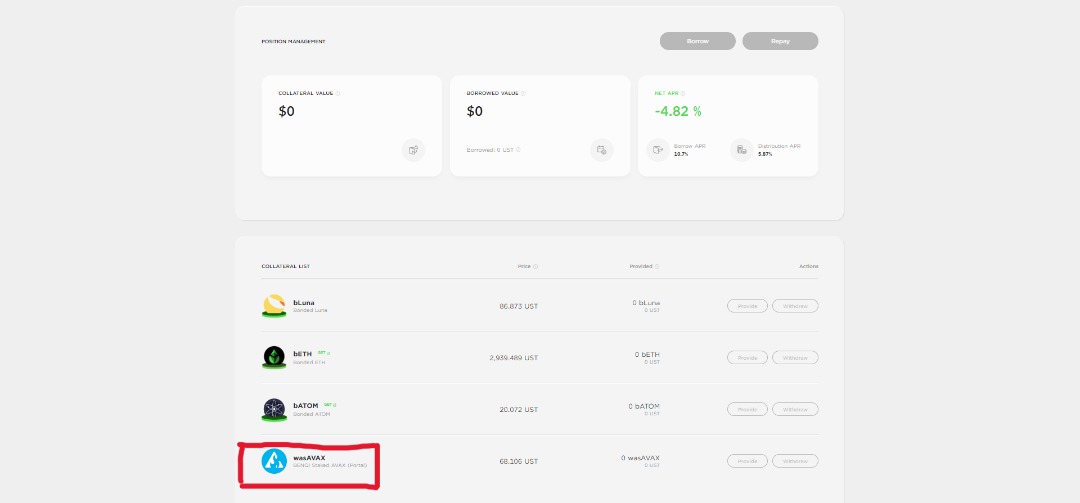
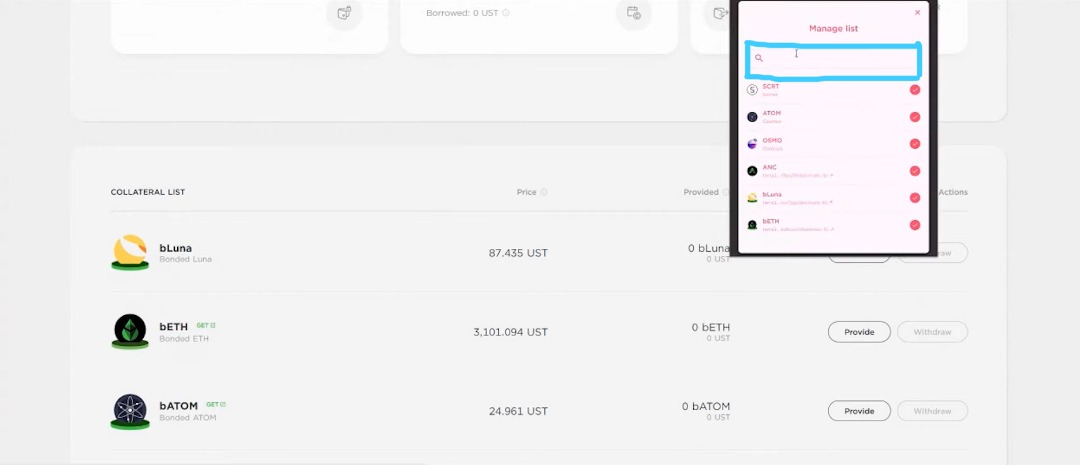
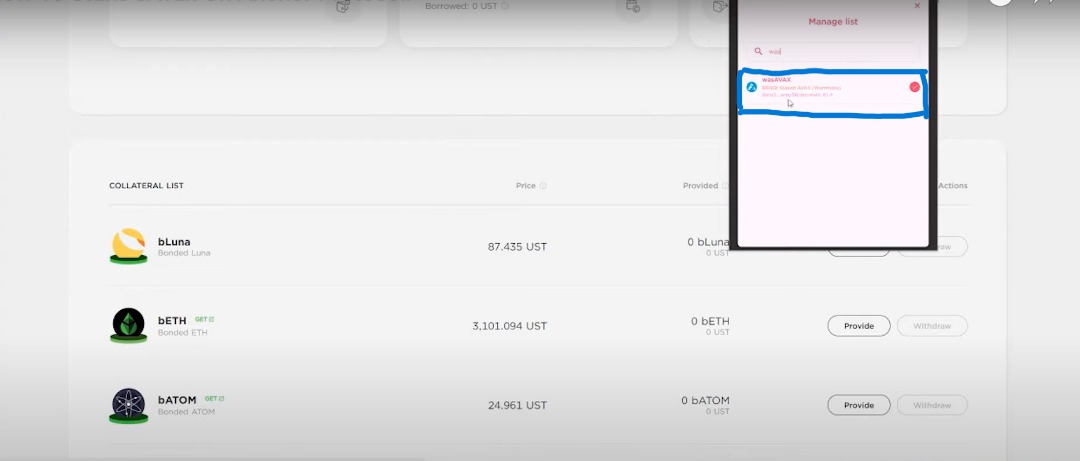
18. To stake your $sAVAX, which is now in the form of $wasAVAX, go to the Anchor Protocol. Also, the new form of $AVAX you have is highlighted in the image below. Connect your wallet: Terra Station wallet to the Anchor Protocol (the connect wallet button is located at the top-right corner of the protocol).
19. Add $wasAVAX to your Terra Station. To do this, click on Add Token and search for $wasAVAX. You’ll now be able to see the amount of $wasAVAX that you have.

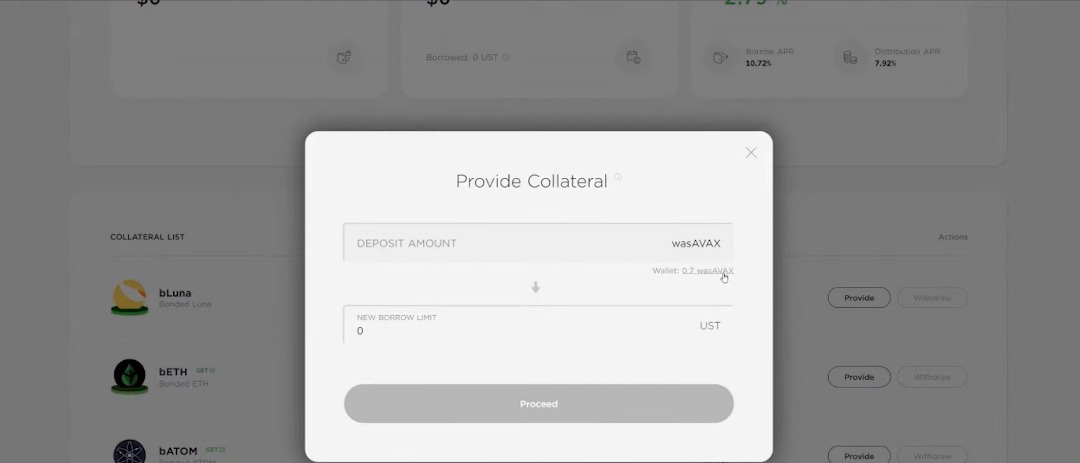
20. While in Anchor Protocol, deposit your $wasAVAX into the protocol. Then, head to the $wasAVAX option and click on the Provide button. Specify the amount of $wasAVAX you want to deposit and confirm the transaction.
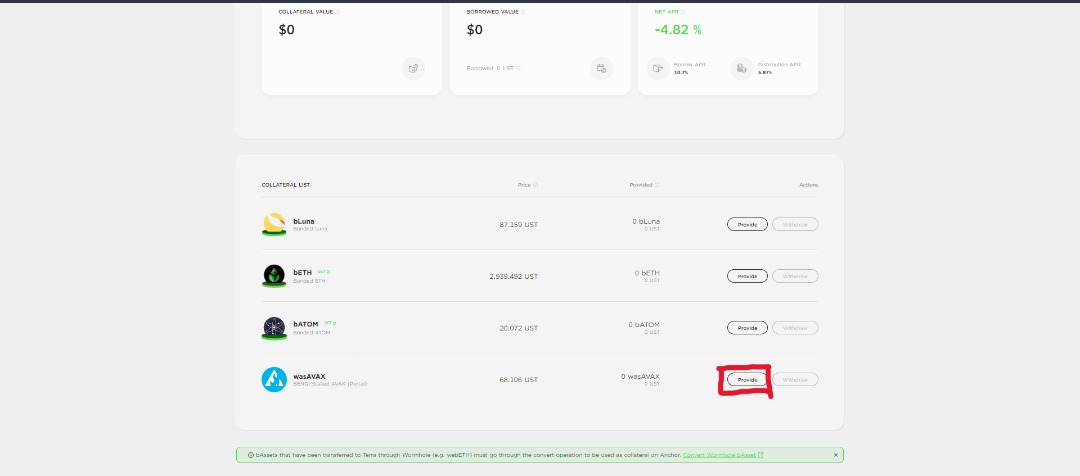
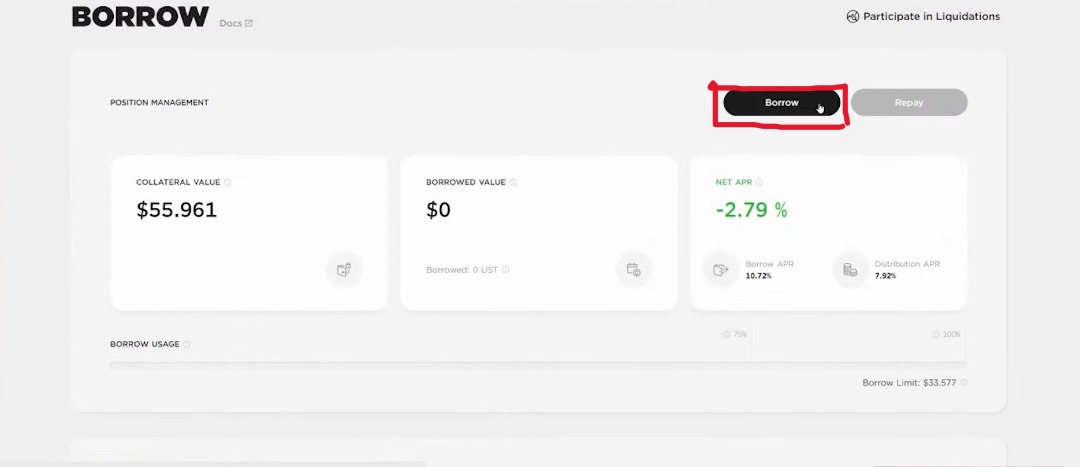
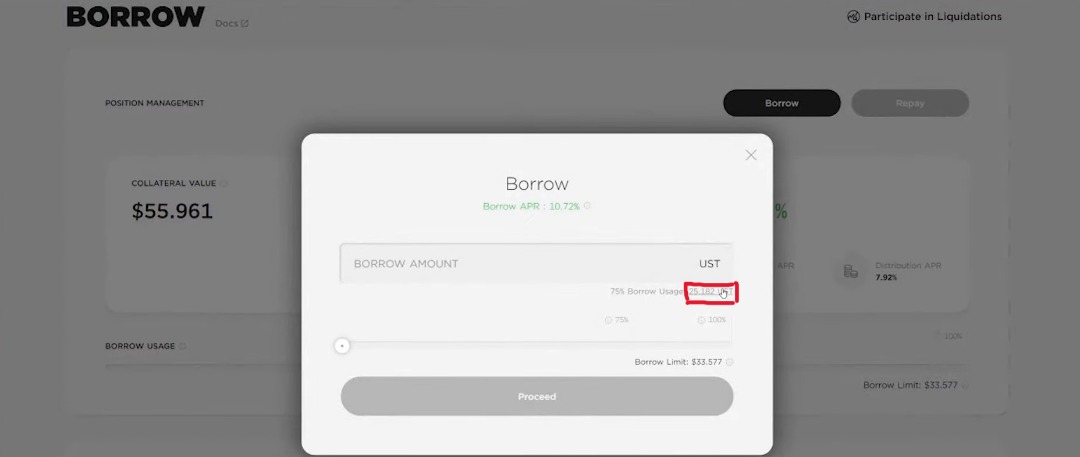
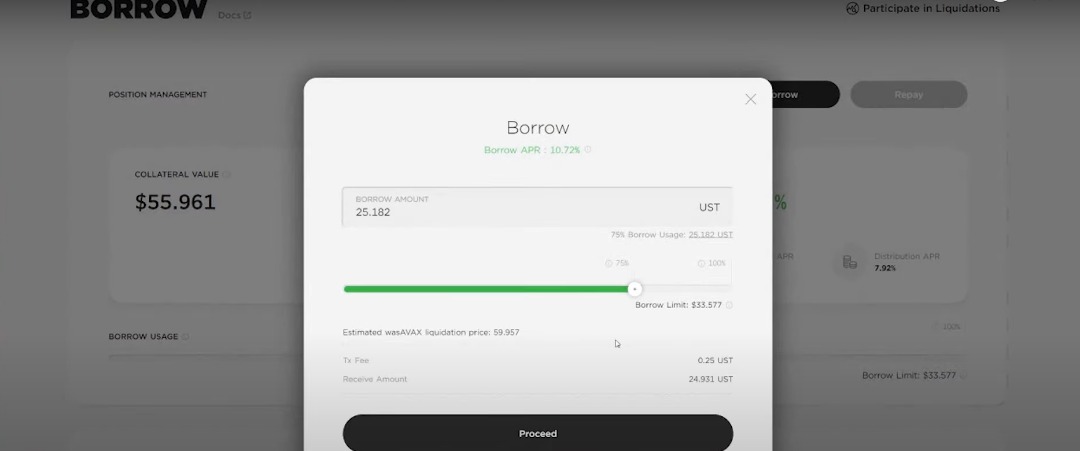
21. Now, you can use your $wasAVAX as collateral on Anchor, borrowing it to get $UST. Furthermore, click on the BORROW button, then specify the amount you want to use, and confirm the transaction.
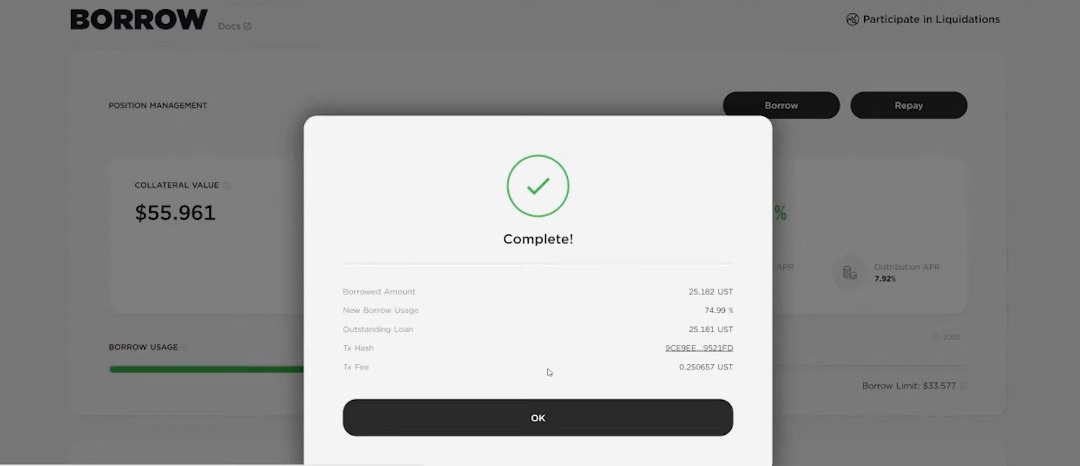
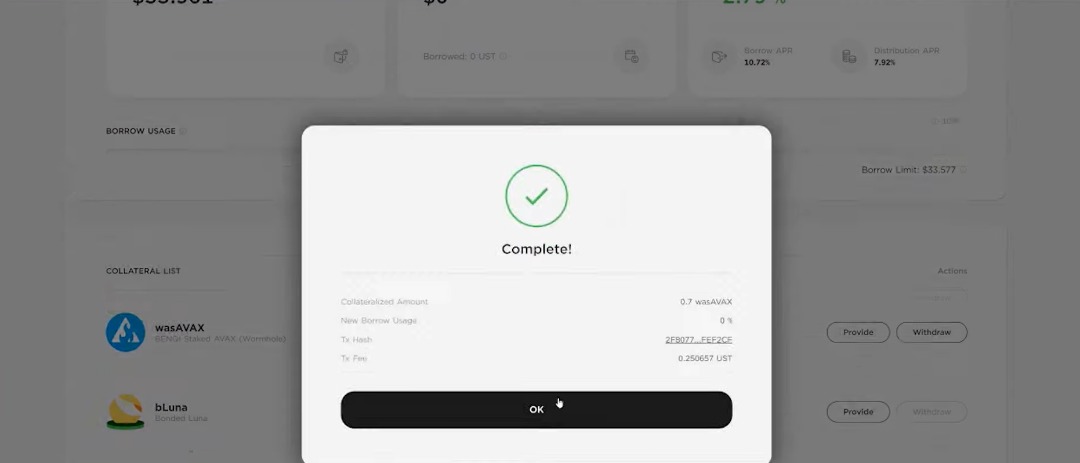
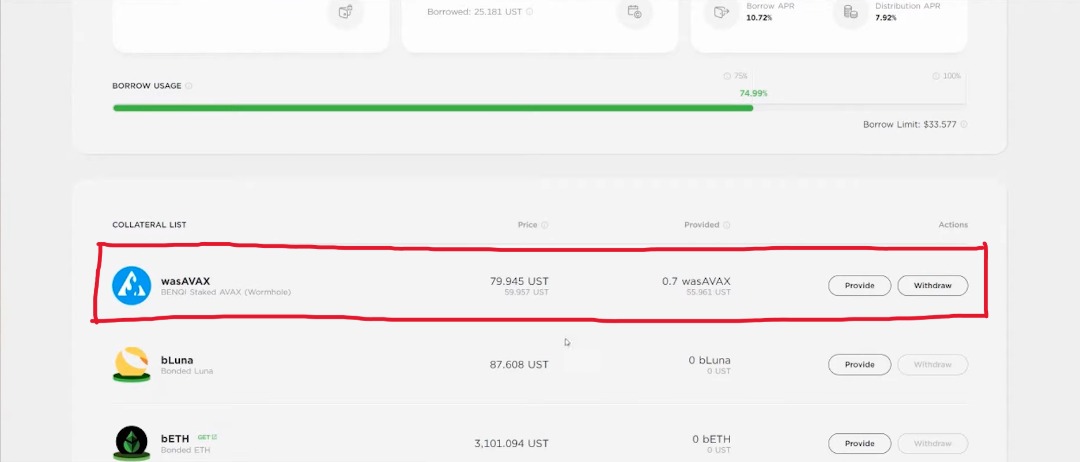
22. Once the above transaction is completed, you’d be able to see the collateral you provided.
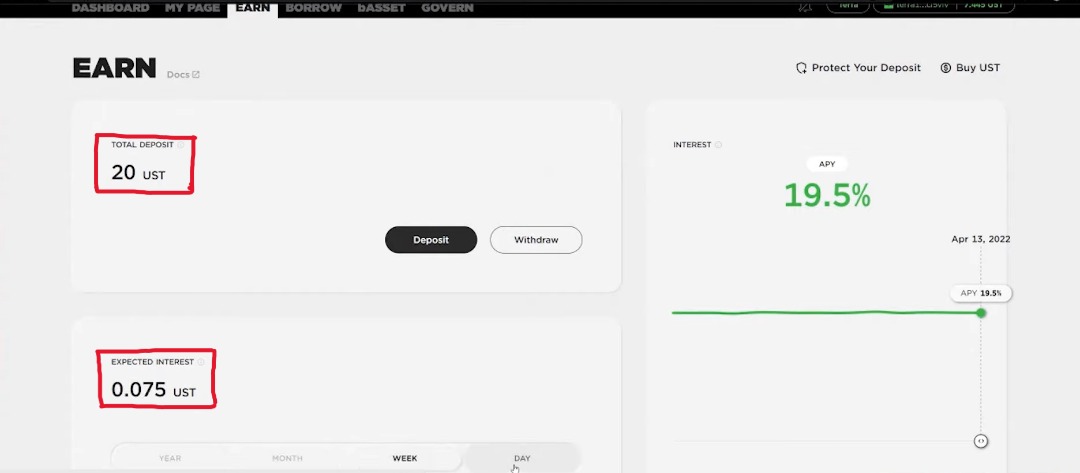
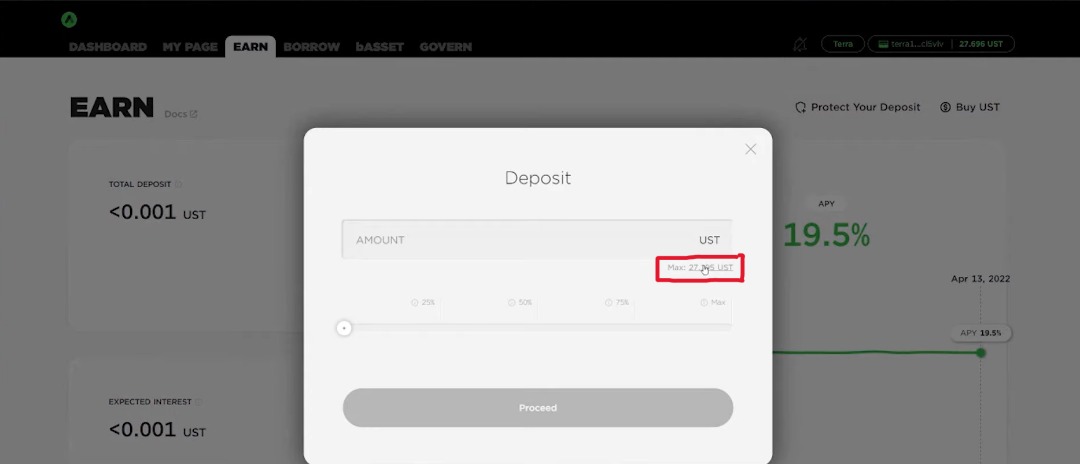
23. You can now use your $UST to earn yield. To do this, head to the EARN page. Additionally, while on the Earn Page, click on the DEPOSIT button to stake your $UST
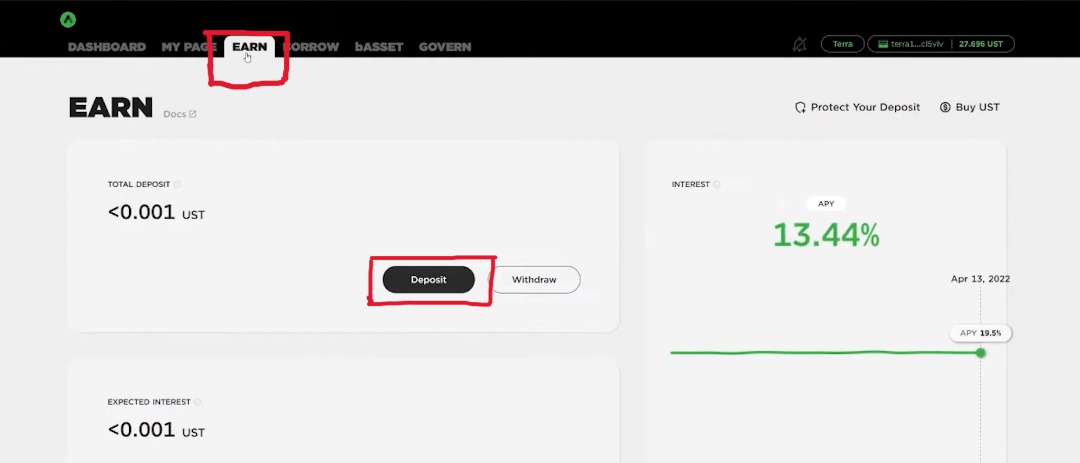
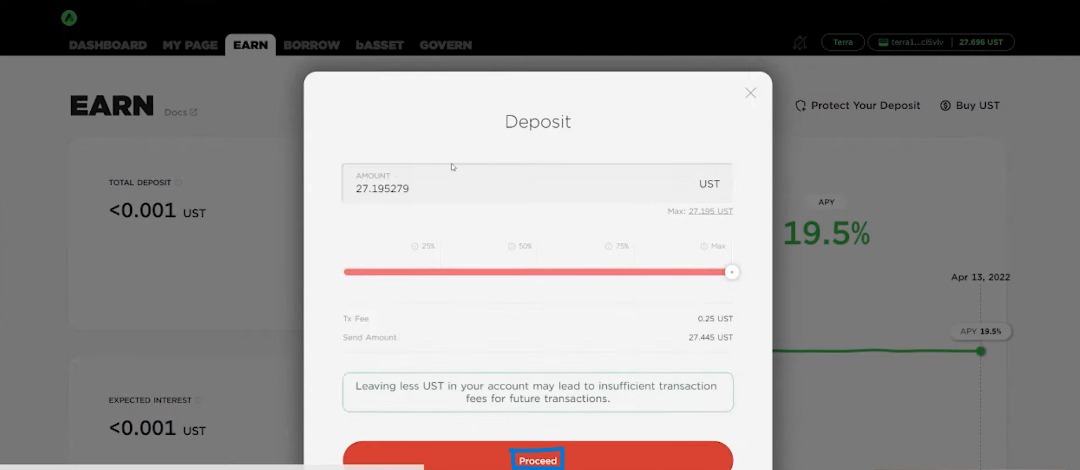
24. Specify the amount of $UST you want to deposit. But, ensure you leave some $UST for transaction fees and future transactions (like when you wish to withdraw your assets).
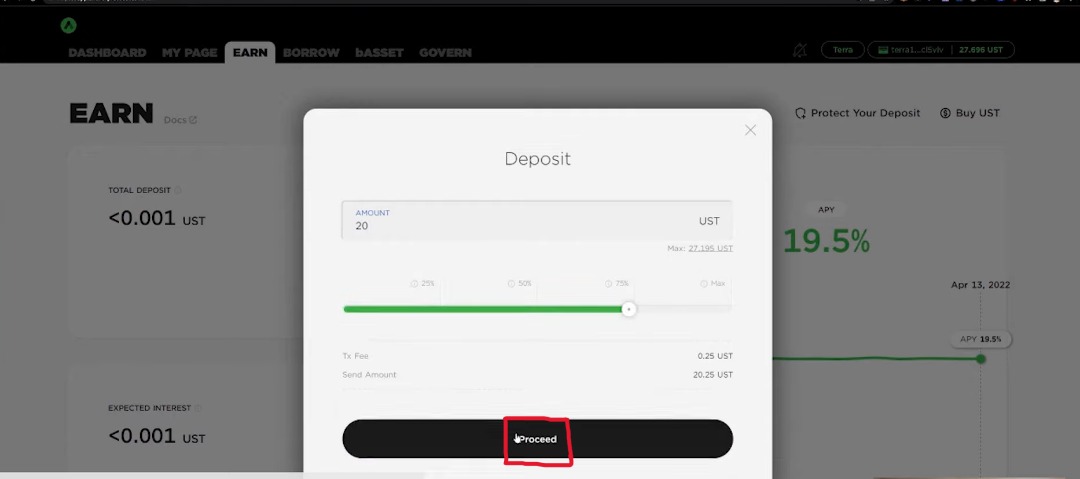
25. Finally, after completing the above step, you’d be able to see the deposited/staked $UST and the value of the yields.