Nowadays, Ethereum users pay between $70-$80 for a single transaction that takes time to confirm. These issues are stoping potential users from using the Ethereum-based dApps.
To overcome these problems, many layer-2 scaling solutions have been created in recent months. Among them, the most popular are Polygon Chain, Arbitrum, ParaState, and Optimistic ethereum.
Also, users can use the bridge service to transfer tokens from Ethereum to one of these layer two solutions. For example, we have previously explained how you can move tokens from Ethereum to Arbitrum and Ethereum to Matic.
Therefore, this article will explain how you can transfer tokens from the Ethereum network to the Optimism Ethereum network by using the Optimism gateway.
What is The Optimistic Ethereum?
Optimistic Ethereum is an EVM- compatible layer two solution. The protocol is designed to offer simple, secure, and fast transactions to users.
Source: Optimism
To use the Optimistic Ethereum, users are required to first transfer the tokens from the Ethereum network to Optimism mainnet by using the platform’s native gateway. The platform supports a large number of dApps. You can access these applications by paying a relatively low transaction fee than the Ethereum network. Some of the most popular dApps supported by Optimistic Ethereum are Uniswap, Synthetix, 1inch, Zapper, etc.
We will now see how you can transfer tokens to Optimistic Ethereum and access these dApps.
Step 1: Connect Wallet With Optimism Gateway
Access the Optimism gateway and connect your wallet.
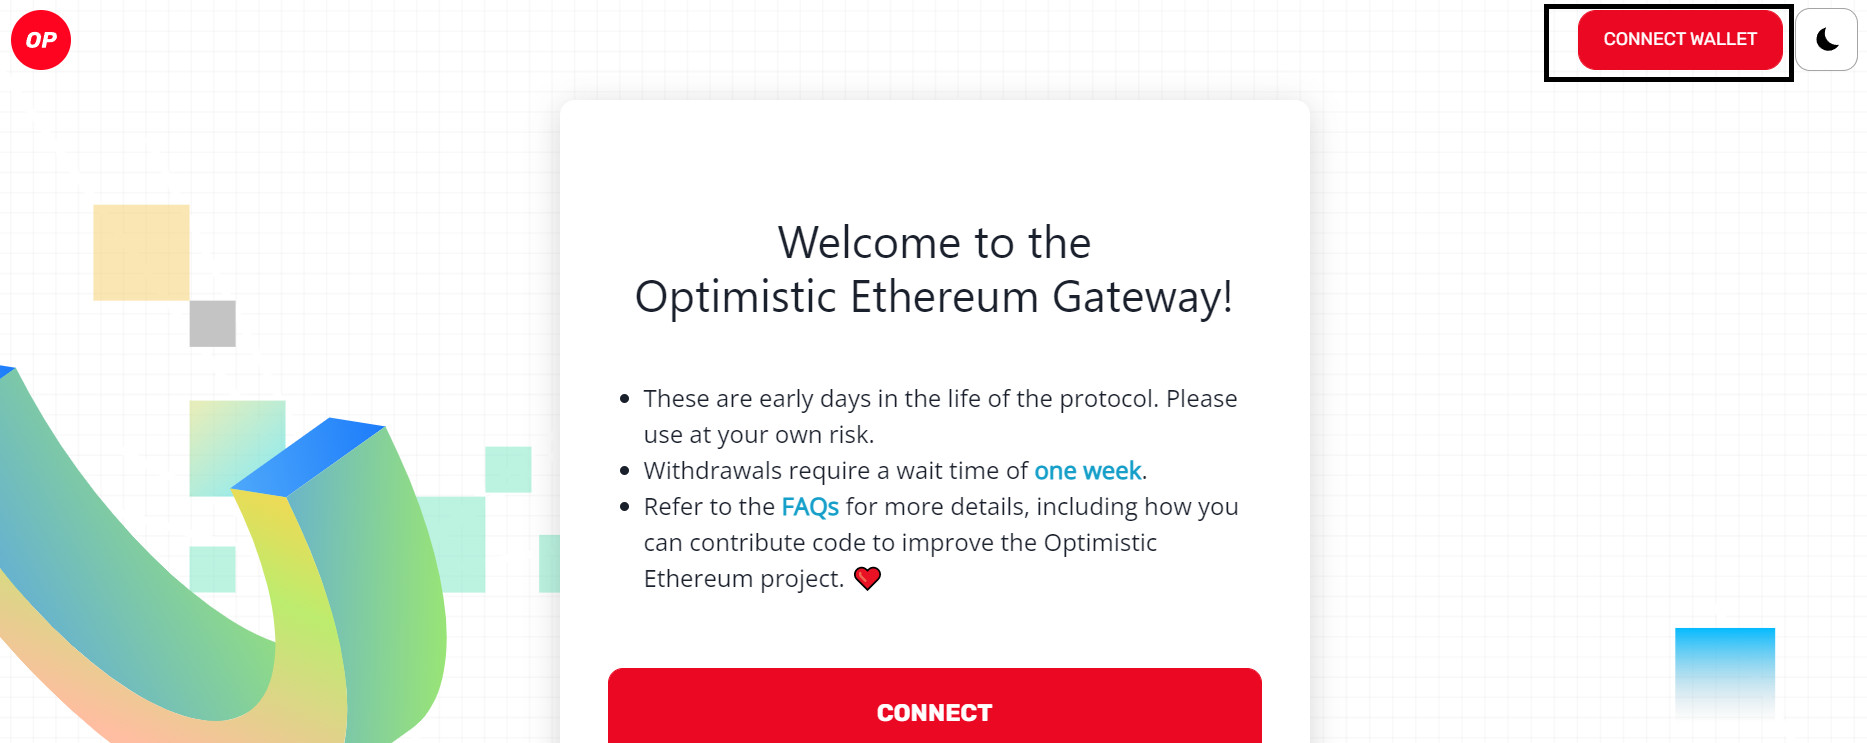
Source: Optimism gateway
The gateway allows the users to connect with the platform using Metamask, WalletConnect, and Coinbase Wallet.
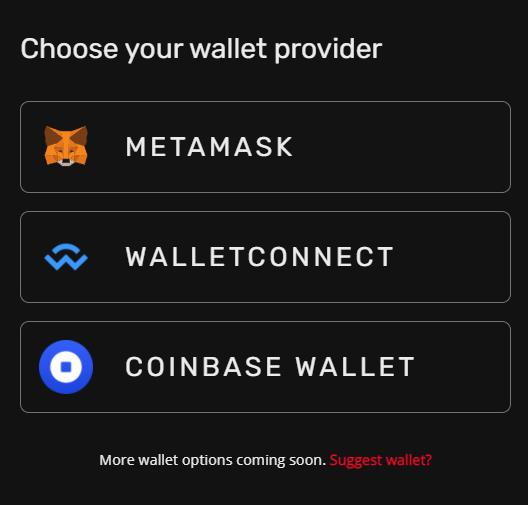
Connect with your desired wallet. In this case, we are connecting with Web 3 Metamask wallet.
Supported Assets on Optimistic Ethereum
The Optimism gateway allows you to deposit Ethereum (ETH), USDT (Tether USD), DAI Stablecoin, USDC (USD Coin). Also, LINK (Chainlink), UNI (Uniswap), SNX (Synthetix), among others.
Step 2: Deposit Tokens in an L2 Solution.
Users can use the gateway service to deposit/transfer tokens from L1 to L2 solutions. For example: From Ethereum to Optimistic Ethereum.
To do that, you need to go to the deposit tab. Select the token that you wish to deposit and enter the desired amount. In this case, we are depositing ETH, but you can select any of the supported tokens mentioned above.
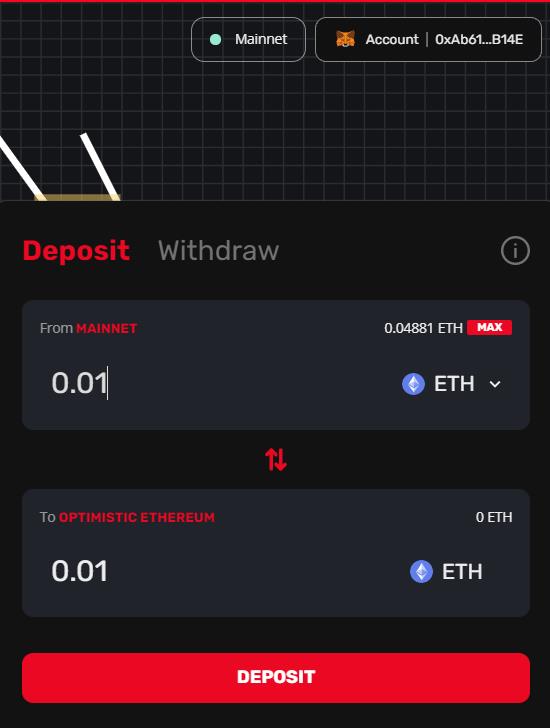
Enter the details and click on the Deposit button.
As a result, the application will ask you to approve the deposit process. This will trigger a Metamask transaction that you need to confirm. Note: Users must hold enough amount of ETH in their wallets to cover the gas cost. In the picture below, you can see how you can complete the deposit.
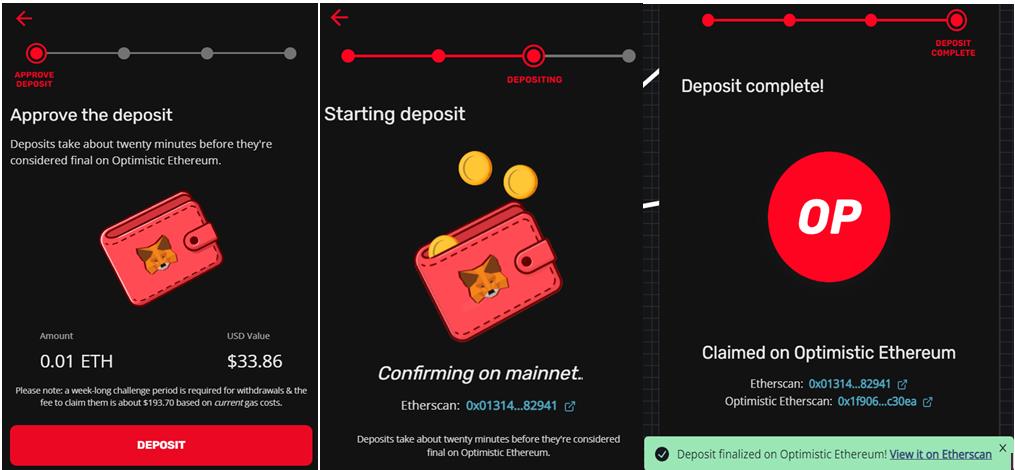
The deposit process will take some time. You will receive a confirmation message when the process is done.
Step 3: Add Optimistic Ethereum to MetaMask
To check the token in Optimistic Ethereum, users must add the Optimistic Ethereum network details in their MetaMask wallet.
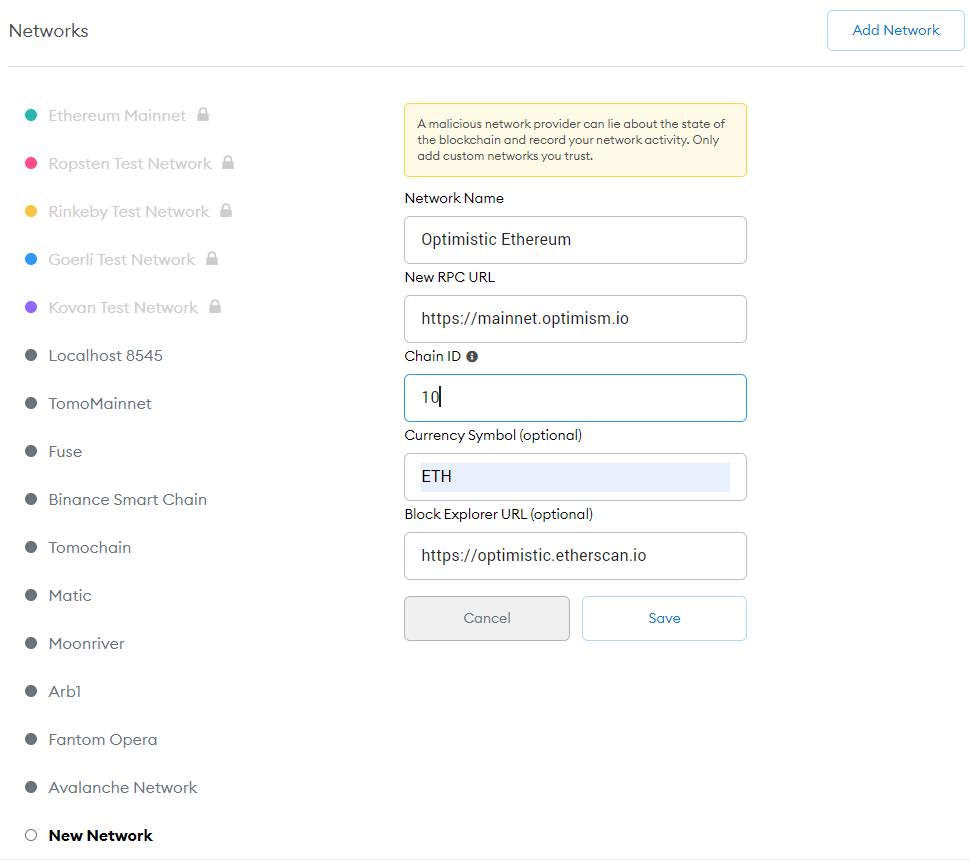
To add the details, go to Setting-> Network-> Add Network, and add the below details:
- Network Name: Optimistic Ethereum
- New RPC URL: https://mainnet.optimism.io
- Chain ID: 10
- Currency Symbol: ETH
- Block Explorer URL: https://optimistic.etherscan.io
Save the details. Now, you can see the ETH token balance in your Metamask wallet with the network selected as Optimism Ethereum.
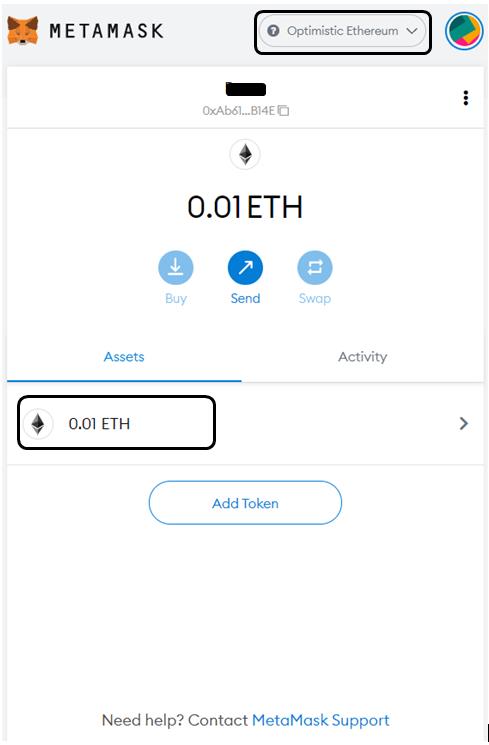
You can now use this token to access the dApps supported by Optimism Ethereum.
Step 4: Access Decentralized Application
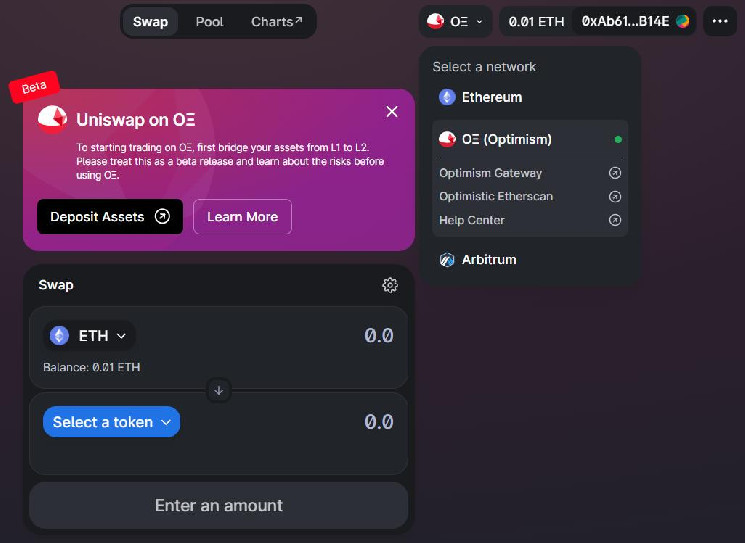
Optimistic ethereum supports a large number of applications, bridges, tools, and wallets. Here you can check the complete list. In this case, we will access the Uniswap platform and perform a transaction with the Optimism Ethereum network.
To do this, you need to go to the Uniswap page. As you can see from the below screenshot, you can select Optimism, Ethereum, or the Arbitrum Network. In this case, we will choose the Optimism Network.
To perform the swap activity, select the input and the output token first. Now, fill in the amount of input token that you wish to swap with the output token. The application will show you the amount of output token that you will receive after the swap.
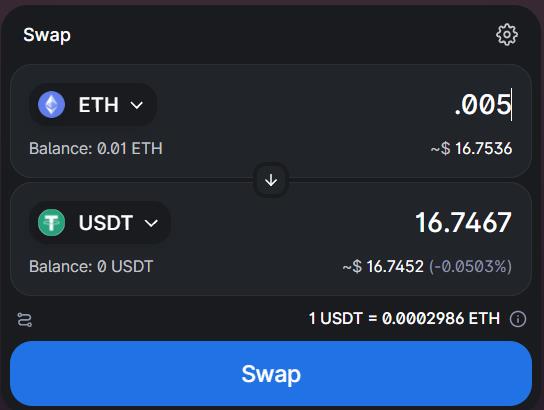
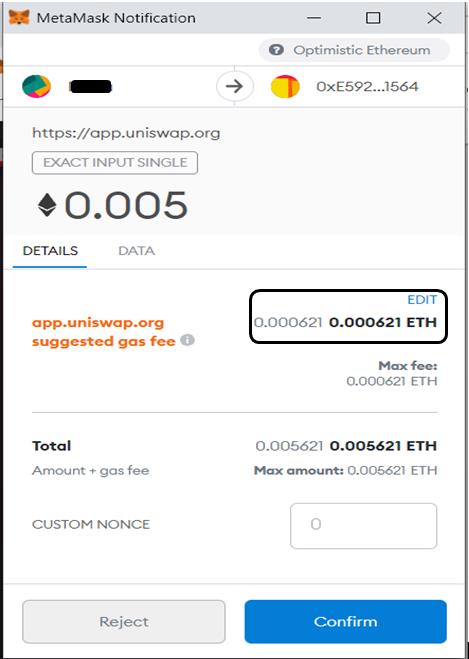
To confirm the swap, a Metamask transaction will pop up. As you can see from the below picture, the transaction charges a meager gas fee compared with the Ethereum transaction. Finally, confirm the transaction.
Step 5: Add an Optimism Token In Metamask
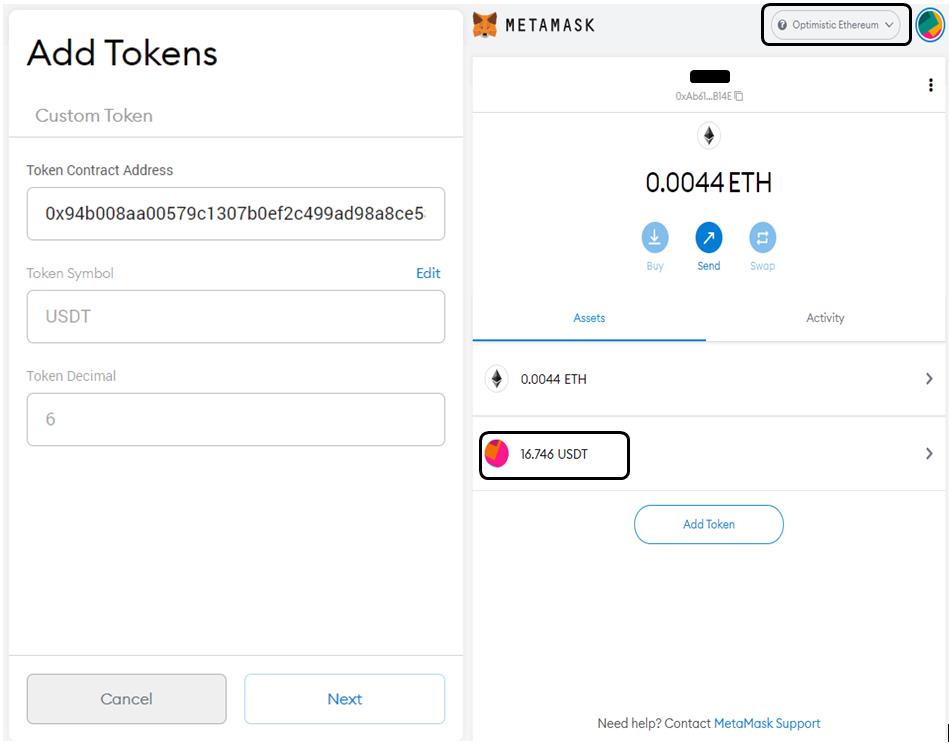
If you are using an optimism token for the first time, you will not see the token balance directly in your wallet. You have to manually add the token contract address to see the token.
USDT Contract Address (Optimism Ethereum) – 0x94b008aa00579c1307b0ef2c499ad98a8ce58e58
To add the token, click on Add Token and fill in the contract address. You can now see your token balance in your Metamask wallet.
Step 6: Withdraw
Users can initiate a token withdrawal process from Optimism Ethereum at any time.
To do it, you need to set their Metamask network to Optimism Ethereum mode. Now, go to the Withdraw tab, and enter the token and the amount you wish to withdraw.
Click on the Withdraw button. The application will ask you to approve the withdrawal process and show you the estimated cost to complete the transaction. Finally, end the withdrawal process. You can see these steps in the picture below:
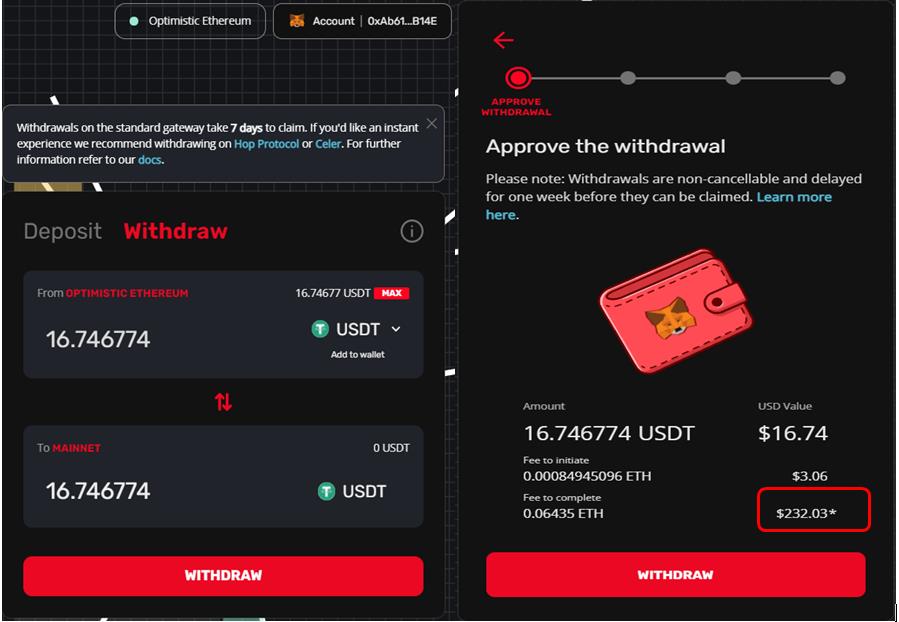
Note: If you are using Hop or Celer, the amount (transfer amount minus input amount) will be available to your wallet within minutes. However, you have to wait for seven days to claim your tokens if you are withdrawing using Optimism gateway.