Arbitrum was built by Off-chain Labs, which is considered a layer two solution for Ethereum dApps.
Arbitrum bridge was designed to improve the limitations of the Ethereum network. It offers high-throughput and low-cost fees transactions along with maintaining high-security standards. The platform is backed up by a world-class team of researchers, engineers, and Ethereum enthusiasts.
Key Features
The platform supports the following unique benefits:
- Trustless security: Security is guaranteed by the underlying Ethereum network, with any other party can ensure optimized Layer 2 results.
- Ethereum Compatibility: EVM Compatibility at the bytecode level. Allows easy deployment of Solidity and Vyper smart contracts or any other language that can be compiled to EVM
- Scalability: Designed to support most of the smart contracts computation and off-chain storage. Thus, allowing higher throughput.
- Cost-Effective: The layer 2 scaling solution for Ethereum, Arbitrum, was designed to minimize the transaction cost.
This guide will explain how you can transfer your ETH/ERC-20 tokens into the Arbitrum network.
You can also read our previous guides:
-
How To Transfer ERC-20 Tokens To the Binance Smart Chain With The Binance Bridge
-
Transfer BEP-20 Tokens To Polygon With XPollinate Bridge
- How to transfer Enjin from Ethereum to Jumpnet
Usage Guide
Visit this link to start using the Arbitrum bridge.
For instance, the Arbitrum bridge is in the beta phase. So take utmost care while connecting your wallet and using it.
Step 1: Add The Arbitrum Network
The Arbitrum network allows users to connect with the platform and the bridge using their Web 3 dApp, i.e., Metamask wallet. Therefore, users are required to add the Arbitrum network details in their Metamask wallet by using any of the two below methods:
-
Method 1: Manual
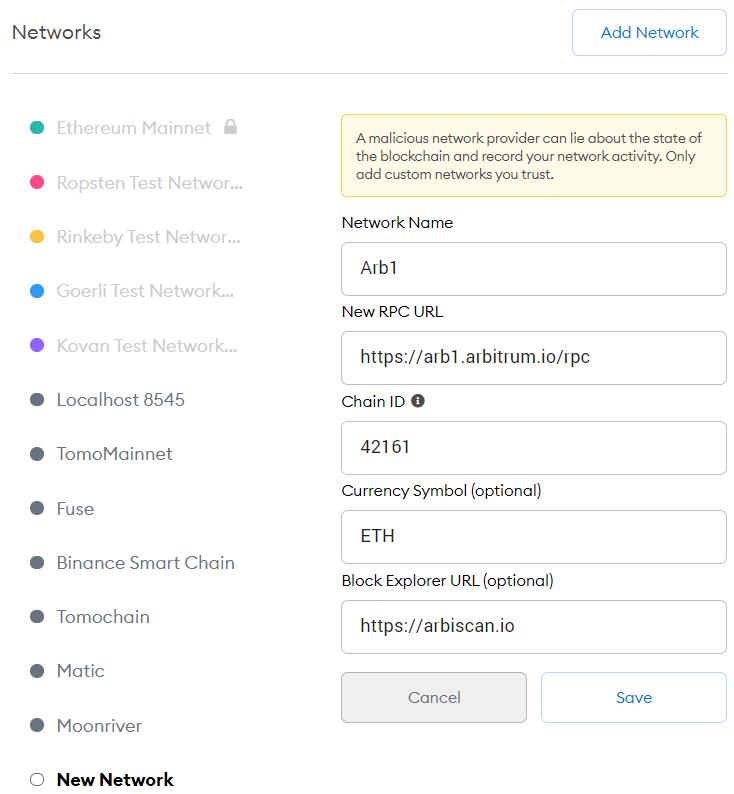
Users can add the Arbitrum network details manually. To do it, go to the Setting-> Network-> Add Network, and fill in the following information.
- Network Name: Arb1
- RPC: https://arb1.arbitrum.io/rpc
- Chain ID: 42161
- Currency Symbol: ETH
- Block Explorer URL: https://arbiscan.io
-
Method 2: One-Click
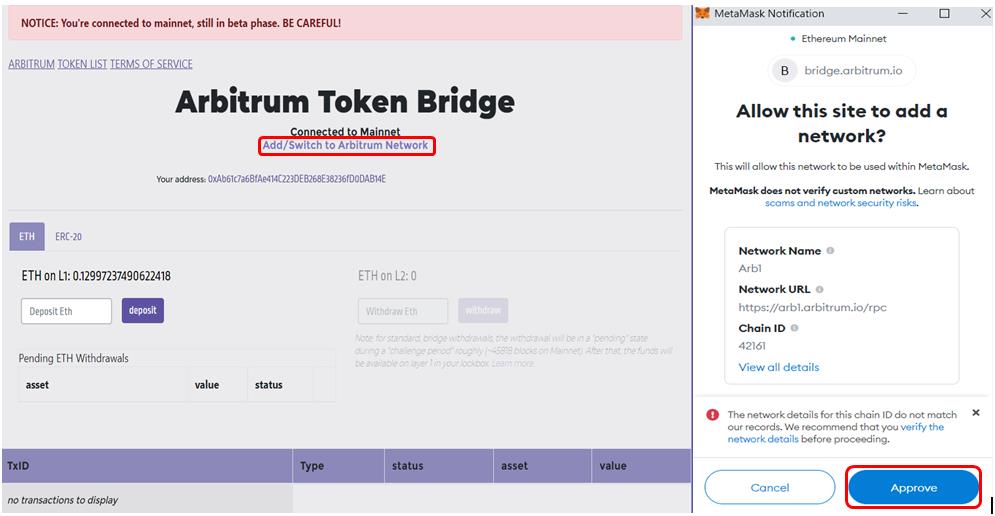
The Arbitrum network offers a very convenient way to add the network details to the Metamask wallet. To do it, you need to go to the Arbitrum bridge website. You will find a button Add/ Switch to Arbitrum Network (as highlighted in the below screenshot). Click on that button, and you will receive a pop-up message in your Metamask wallet that you need to approve. Once approved, the network will be added to your Metamask wallet.
Step 2: Transfer ETH/ ERC-20 Tokens from L1 → L2
Users can use the Arbitrum bridge to transfer Ethereum and other supporting ERC-20 tokens from the L1 to the L2 network. The Ethereum deposit is simple. You need to enter the value you wish to deposit and confirm the deposit process.
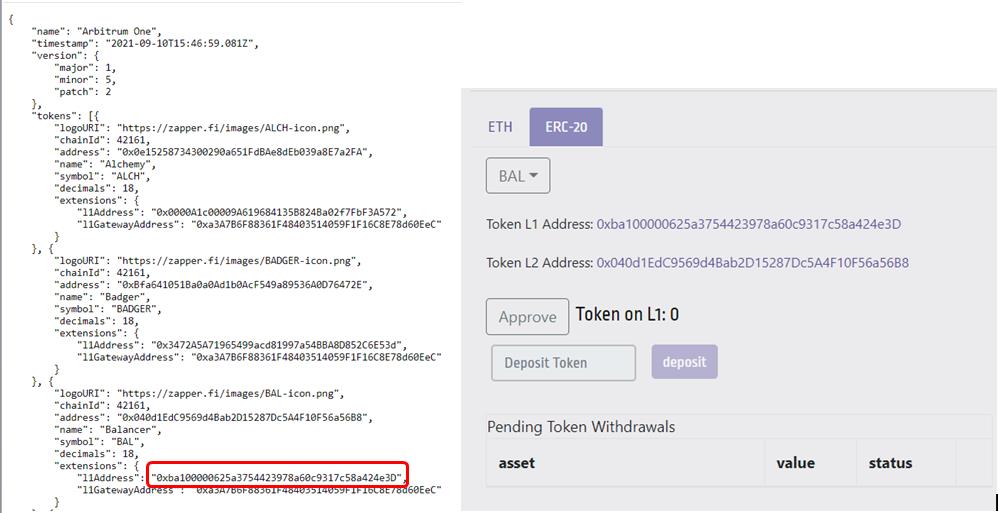
For ERC-20 tokens, you have to copy the token contract address from the Token List JSON file, and manually paste the address in the deposit field.
For example, suppose you wish to deposit the Balancer token, then go to the Token list file. Copy the l1Address and paste the address in the deposit address field. Just like in the picture below:
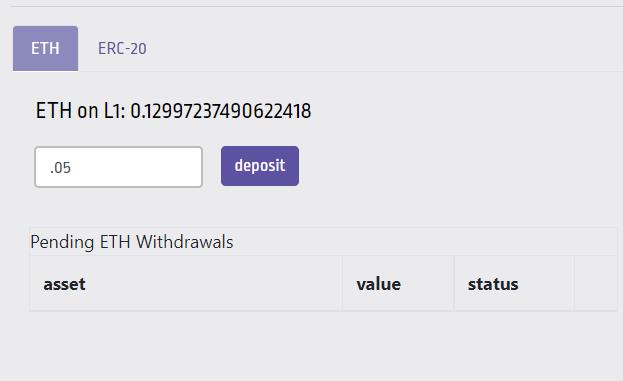
For ETH, enter the amount of token you wish to transfer to the L2 network and confirm the process by clicking the Deposit button. See the picture below for more details:
This will trigger a Metamask transaction that you need to confirm. Once you confirm the transaction, it will take around 10 min to 1 hr for the tokens to move to the Arbitrum network depending upon the network’s congestion.
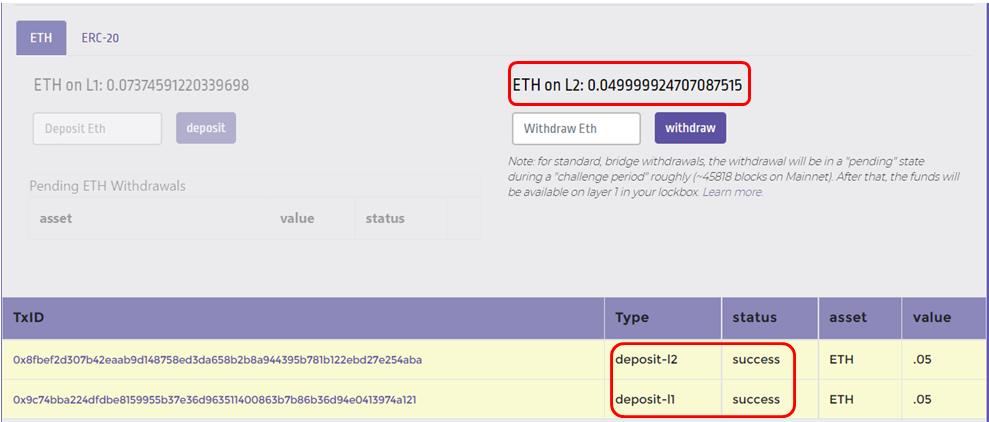
You can check the transaction status (TxID) at the bottom of the page. Once both the L1 and L2 deposits are successful, the desired token amount will be reflected on the ETH L2 section. More details are in the picture below.
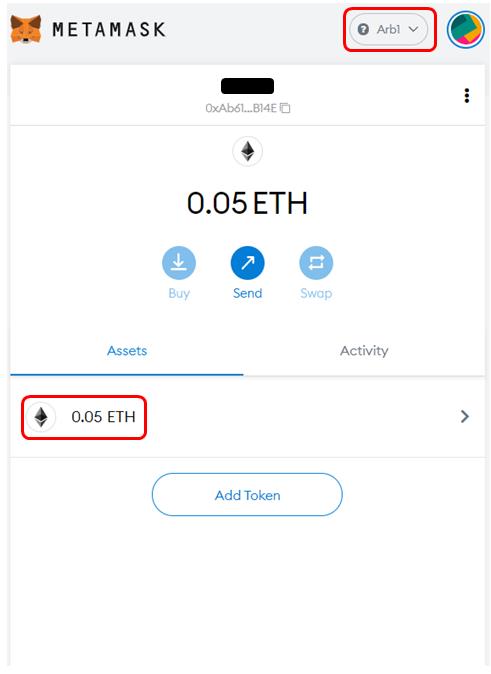
You can also check the token value in your Metamask wallet with the network selected as Arbi.
Step 3: Withdraw From L2 to L1
To withdraw your tokens from the Arbitrum L2 network to the L1 network, you need to set your Metamask wallet to the Arbi network. Then, you need to enter the number of tokens you wish to withdraw in the Withdraw field.
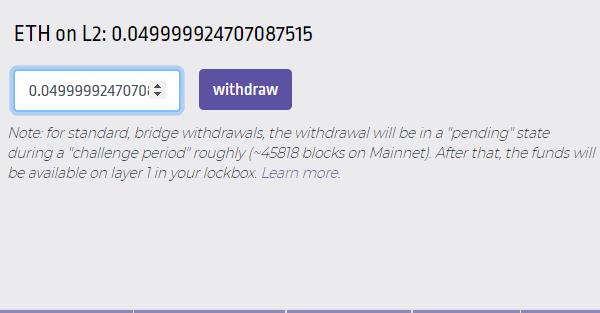
Once you initiate the withdrawal, the transactions will be moved to the “pending state.” It will take around one week (called challenge period approx ~45818 blocks on Mainnet) before you can claim your funds on the L1 network.
Note: At the time of writing this article, the withdrawal function was not working. So, we couldn’t capture the results. Once it starts working, we will update the guide with complete withdrawal (pending state plus final withdrawal to the wallet).